
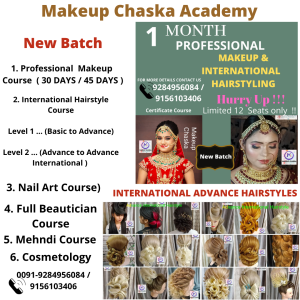
Mehendi Artist Classes Mehndi Course Design Academy Nagpur India

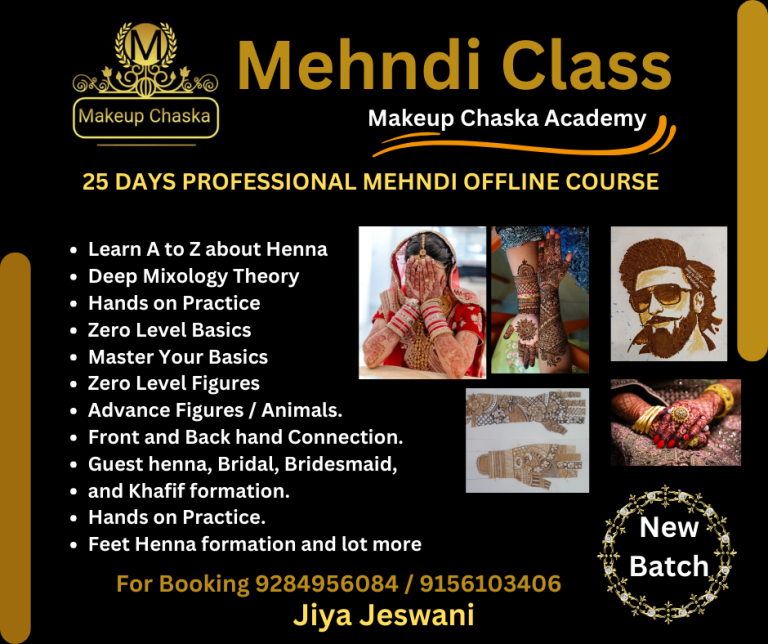
Mehendi Artist Classes Mehndi Course Design Academy Nagpur
Basic To Bridal Level 1
- Basic Knowledge ( Heena Paste And Cone Making )
- How To Hold Mehendi Cone
- Basic Lines And Basic Sculps
- Basic Filler
- Basic Checks
- Advance Checks
- How To Draw Kairi And Feeling
- Types Of Flowers
- Types Of Leaves
- Lotus Cut Work
- Feeling Of Cut Work
- Peacock
- Types Of Peacock
- Arbic Belt
- Indo Arabic
- Dubai Mehendi
- Indian Mehendi
- Dhol Shehnai And Kalash
- Walking Elephant
- Royal Elephant
- Bride Face
- Bride Figure
- Groom Face
- Groom Figure
- Full Hand Design
- Leg Design
- Bride And Groom 3 / 4 Face
- Basic Test
- Demo Session
- Exam
- Doubt Session And Certificate Provided
Fees: 6000/-
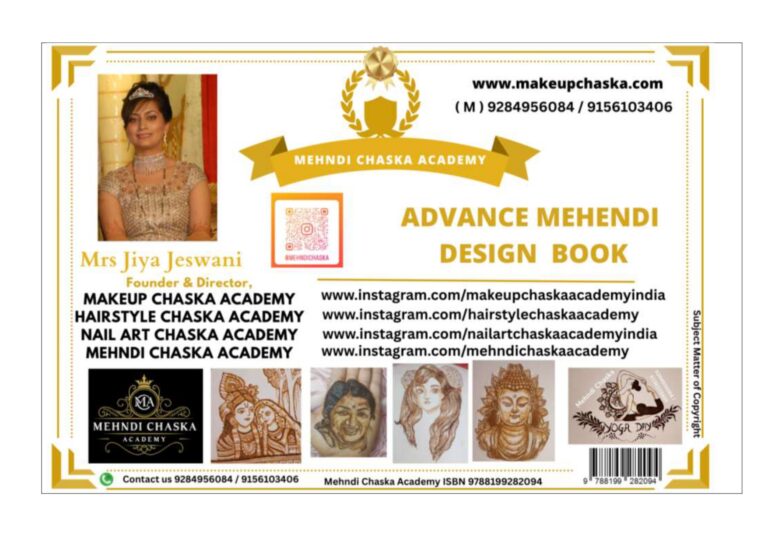
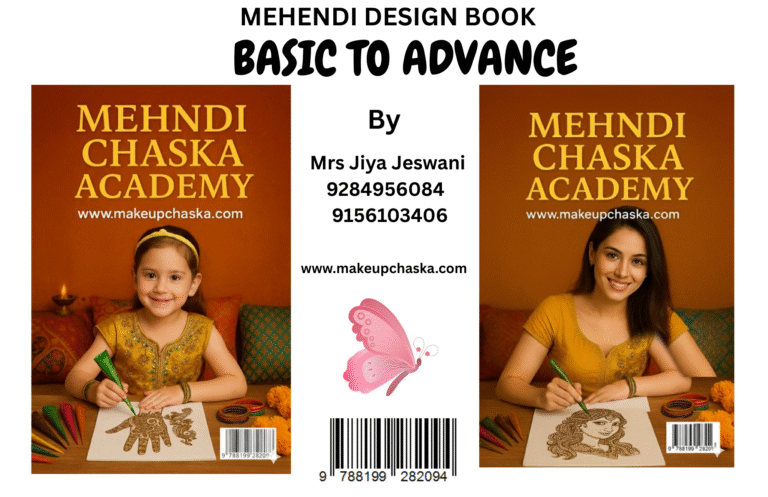
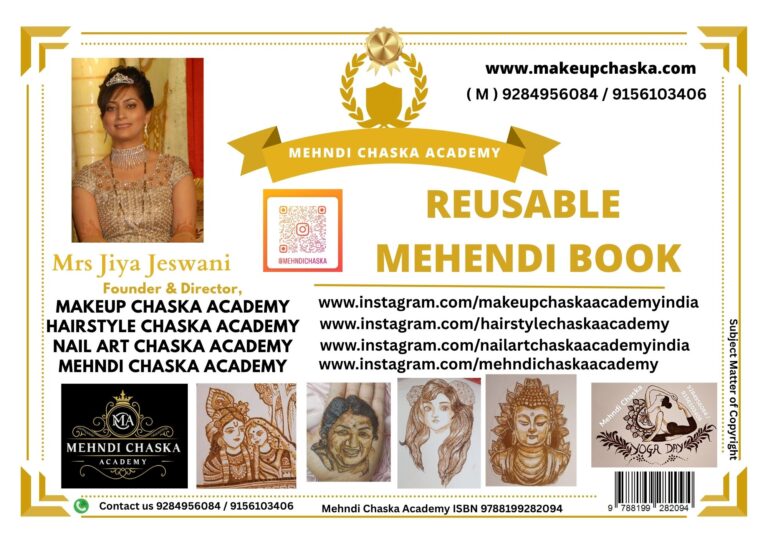
Mrs. Jiya Jeswani
Contact 9284956084 Or 9156103406
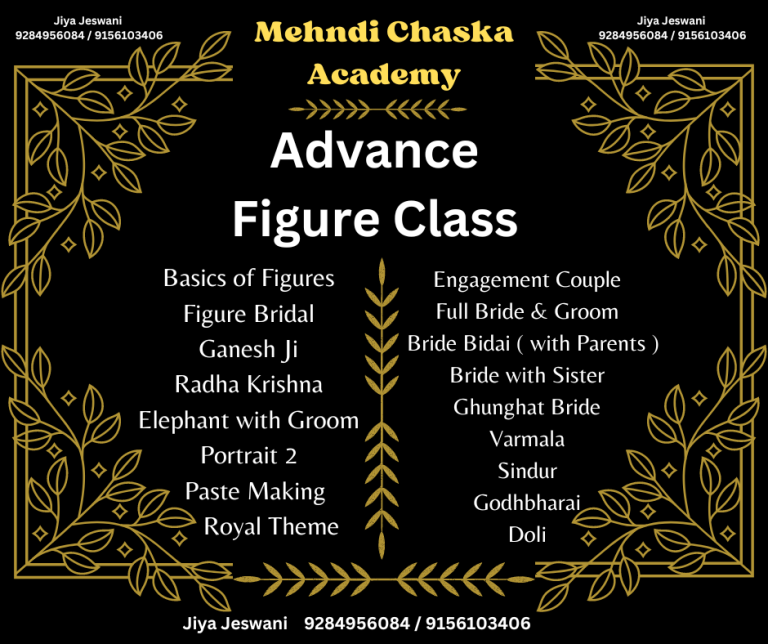
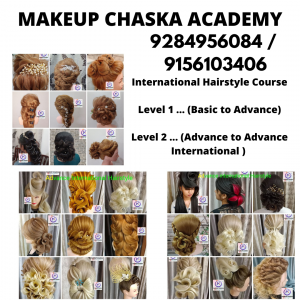
Advance Figure Class Syllabus Level 2
- How To Make Bridal Mehendi Cone Making
- Bride And Groom Side Face
- Bride And Groom 3 / 4 th
- Varmala, Sindoor
- Phere With Agni
- Walking And Royal Elephant
- Dhol Shehnaj And Kalash
- Musician Lady And Gents
- Bidai , Doli
- Engagement Figure
- Baby Shower Figures
Exam
Doubt Session And Certificate Provided
Fees: 4000/-
Mrs. Jiya Jeswani
Contact 9284956084 Or 9156103406
Basics To Advance Level 3
- Basis Of Mehndi
How To Make Mehndi Paste
How To Make Mehndi Cone
Introduction To Basics Of Mehndi Designs
Basic Mehndi Shapes
Basic Mehndi Belt Designs
Basic Mehndi Filling Designs
Basic Finger Mehndi Designs
- Advance Mehndi
Six Types Of Borders
Six Types Of Belt
Six Types Of Vines
Four Types Of Jhumkas
Four Types Of Shapes
3d Checks Design
Heavy Checks Design
Heavy Finger Designs
- Tattoo Mehndi Designs
Tattoo Style Lettering A To Z
- Arabic Mehndi Designs
Introduction To Arabic Design
Introduction To Arabic Elements
Borders Of Arabic Design
Back Hand Arabic Finger Design
Arabic Design Step By Step
Basic Front Hand Arabic Design
Basic Back Hand Arabic Design
Advance Front Hand Arabic Design
Advance Back Hand Arabic Design
Advance Arabic Hand Arabic Design
Front Hand Arabic Designer Mehndi
Back Hand Arabic Designer Mehndi
Basics Of Arabic Bridal Design
Borders Of Arabic Design
Arabic Style Checks
Arabic Bridal Patch
Arabic Bridal Mehndi Designs ( Flowers )
Indo Arabic Bridal Mehndi
Draw Front Hand Arabic Mehndi Design
Draw Back Hand Arabic Mehndi Design
- Dubai Mehndi Designs
Dubai Style Flowers And Leaves
Gulf Mehndi Elements On Hand
Basic Front Hand Dubai Design
Basic Back Hand Dubai Design
- Mandala Mehndi Design
Mandala Mehndi Design
Basic Back Hand Mandala Design
Mandala Designs
Mandala For Bridal Mehndi Design
- Jewelry Mehndi Designs
Basic Back Hand Jewelry Mehndi Design
- Floral Mehndi Designs
Introduction To Floral Mehndi
Floral Bunch
Floral Cutwork Using Different Flowers
Indo Floral Mehndi Design
Trendy Floral Belt Used In Bridal Mehndi
Floral Borders Of Bridal Designs
Indo Floral Mehndi Design
Floral Bridal Mehndi Design
- Indian Mehndi Designs
Different Types Of Lotus Shapes And One Easy Cutwork
Trendy And Heavy Lotus Belt
- Easy Lotus Making
Nine Types Of Lotus
Front Hand Lotus Mehndi Design
Easy Four Trendy Indian Filling
Basic Front Hand Indian Design
Basic Back Hand Indian Design
Advance Front Hand Indian Design
Advance Back Hand Indian Design
Front Hand Peacock Mehndi Design
Back Hand Lotus Cutwork Design
Advance Back Hand Rose Belt And Lotus Mehndi Design
Full Hand Mehndi ( Indian )
- Designer Mehndi Designs
Advance Front Hand Bell Mehndi Design
Advance Front Hand Peacock Mehndi Design
Advance Front Hand Cage Mehndi Design
Advance Front Hand Elephant Mehndi Design
Kalamkari Peacock
Kalamkari Parrot
Parrot With Jumkas And Jumka Making
Peacock Shape With Cutwork Design
Advanced Peacock Design
Madhubani Parrot
Madhubani Peacock
Kalash Dhol Tabal And Shehnai Making
Dhol And Kalash
Types Of Peacock
Types Of Parrots Swans And Birds
- Bridal Mehndi Designs
Introduction To Elements Of Bridal Mehndi
Do’s And Don’t’s Of Bridal Design
Elements Of Negative Design
Borders Of Negative Design
Borders For Bridal Mehndi
Checks Designs For Bridal Mehndi
Dulhan Face Making
Dulhan Full Figure Mehndi
Dulhan With Dholi
Four Types Of Dholi Shapes
Bride 3 / 4 Th Face
Bride Full Figure With 3 / 4 Th Face
Step By Step Dulhan Mehndi Design
Groom 3 / 4 Th Face
Groom Full Figure With 3 / 4 Th Face
Groom On Elephant
Groom Face Making
Groom Full Figure Mehndi Step By Step
Portrait Of Bride And Groom
Dulha Dulhan Side Face
3 / 4 Th Face Dulha Dulhan
Full Dulha Dulhan Figures
Advance Bride And Groom Mehndi Design
Advance Front Hand Engagement Design
Advance Front Hand Ring Ceremony
Engagement
Bride With Mala
Groom With Mala
Varmala Theme
Sindhoor Ceremony
Phera Couple Mehndi
Demo Of Bridal Mehndi
Bridal Mehndi Designs
Gujrati Mehndi Designs
Indian Mehndi Designs
- Figure mehndi designs
Front hand monsoon mehndi design
Baby shower design ( ghodh bharai )
Baby shower mehndi
Elephant figure in border or belt
Four Types of elephants
Types of hand positions
Musician
Royal elephant
Musical figure mehndi ( girl )
Musical figure mehndi ( boy )
Ganesh chaturthi special workshop
Full figure mehndi with background
Arm mehendi step by step
Exam
Doubt Session And Certificate Provided
Fees: 20,000/-
(Normal Fees Rs 25,000/- offer Rs 20,000/- )
Mrs. Jiya Jeswani
Contact 9284956084 Or 9156103406
Mehendi Artist Classes Mehndi Course Design Academy Nagpur


Mehendi Artist Classes Mehndi Course Design Academy Nagpur
Mehendi Artist Classes Mehndi Course Design Academy Nagpur
SYLLABUS IN 3 DIFFERENT LEVEL
LEVEL 1 BEGINNERS LEVEL
LEVEL 2 INTERMEDIATE LEVEL
LEVEL 3 ADVANCE LEVEL
LEVEL 1 BEGINNERS
BASIC KNOWLEDGE OF EACH AND EVERY ELEMENTS OF HENNA
CONE ROLLING PASTE MAKING ( MIXOLOGY )
BASIC ELEMENTS OF HENNA
( DIFFERENT TYPES OF LINES, HUMPS/SCALUPS, SPIRALS/ SWRILLS, DOTS, TEARDROPS MANY MORE BASIC ELEMENTS )
TYPES OF FILLER ELEMENTS BASIC & ADVANCE ( MORE THAN 35 TYPES )
UNDERSTANDING SIZES, SHAPES, SLOW/SPEED UNDERSTANDING HOW TO HOLD HENNA CONE
PRESSURE TECHNIQUES
MOON MOON FLOWER
LEARNING ALL ABOUT PERFECT SIZES AND SHAPES
TYPES OF CHECKS BASIC & ADVANCE ( MORE THAN 100 TYPES )
MINI FLOWER / MINI ROSES ( MORE THAN 30 TYPES )
BASIC FLOWERS ( MORE THAN 30 TYPES )
TEST / THEORY & PRACTICAL
LEVEL 2 INTERMEDIATE
ALL ABOUT CONSTRUCTION DESIGN BUILDING
- MANDALA
- FLORAL MANDALA
- FINGERS HENNA DESIGNS
FLORAL FLOWER ( MORE THAN 30 TYPES )
3D FLOWERS/REALISTIC FLOWER ( MORE THAN 30 TYPES )
BASIC LEAVES ( MORE THAN 15 TYPES )
FLORAL LEAVES ( MORE THAN 30 TYPES )
GULFY / SURANI LEAVES ( MORE THAN 30 TYPES )
CONSTRUCTION FORMULA ( 1 ) FLORAL DESIGN
CONSTRUCTION FORMULA ( 2 ) FLORAL DESIGN
NEGATIVE FILLING / REVERSE FILLING / EMBOSS WORK
1 INCH ( MORE THAN 15 TYPES )
2 INCH ( MORE THAN 15 TYPES )
NORMAL CUT WORKS ( MORE THAN 30 TYPES )
3D CUT WORKS ( MORE THAN 30 TYPES )
TYPES OF FEATHERS ( MORE THAN 15 TYPES )
TYPES OF GULFY VINES ( MORE THAN 15 TYPES )
TYPES OF NEGATIVE VINES ( MORE THAN 15 TYPES )
BASIC FLORAL PATCH ( MORE THAN 15 TYPES )
ADVANCE FLORAL PATCH ( MORE THAN 15 TYPES )
EMBOSS PATCHES ( MORE THAN 15 TYPES )
( HOW TO INCREASE SPEED )
BRIDAL BORDER LINE OR BELTS
2 INCH ( MORE THAN 50 TYPES )
4 INCH ( MORE THAN 20 TYPES )
TYPES OF JHUMKA AND HANGING ( MORE THAN 20 TYPES )
TYPE OF SIMPLE BIRDS
TEST / THEORY & PRACTICAL
LEVEL 3 ADVANCE
FLORAL WRIST LENGTH MEHENDI LAYOUT
FLORAL 3 / 4 MEHENDI LAYOUT
FLORAL ELBOW LENGTH MEHENDI LAYOUT
INDIAN BRIDAL STARTUP DESIGNS
TYPE OF CONNECTING ELEMENTS AND HANGING
SURANI PATTERN
TYPE OF KHALEEJI DESIGN
FIGURES WORK
ENGAGEMENT BRIDE
FIGURES OF GANESH JII
GHUNGHAT BRIDE
TYPES OF ELEPHANTS
ELEPHANT WITH GROOM
TYPES OF PEACOCK
VARMALA CEREMONY
SINDUR CEREMONY
DOLI
FULL BRIDE OR GROOM
INDIAN BRIDAL DEMO ON HAND FIGURE WITH FLORAL WORK
BRIDAL DEMO ON HAND & LEGS
CONCEPT OF PAKISTANI BRIDAL HENNA
INDIAN TRADITIONAL BRIDAL HENNA
FLORAL + INDIAN BRIDAL
FLORAL BRIDAL
FEET DESIGNS
HOW TO REACH CLIENTS
HOW TO DEAL WITH CLIENTS HOW TO MAKE RECORD BOOK
TEST/ THEORY & PRACTICAL
REVISION & CLARIFICATION OF DOUBTS.
Mehendi Artist Classes Mehndi Course Design Academy Nagpur
- Basic To Bridal Level
- Advance Figure Class Level 2
- Basics To Advance Level 3
Yes Certificate will be provided.
Topic missed will be covered in next batch on the date and time once communicated to student, after one chance any topic shall not be covered after first next batch.
Fees Once paid shall not be Refunded, management reserved full right not to refund the fees.
Student shall bring there material, academy shall not provide any material. Academy shall not be responsible for loss or theft of students article inside the class. students has to take care there articles inside the class.
- Basic To Bridal Level 1
- Advance Figure Class Level 2
- Basics To Advance Level 3
Depending on Students Practise normally it completes in 30 to 90 days (level 3)
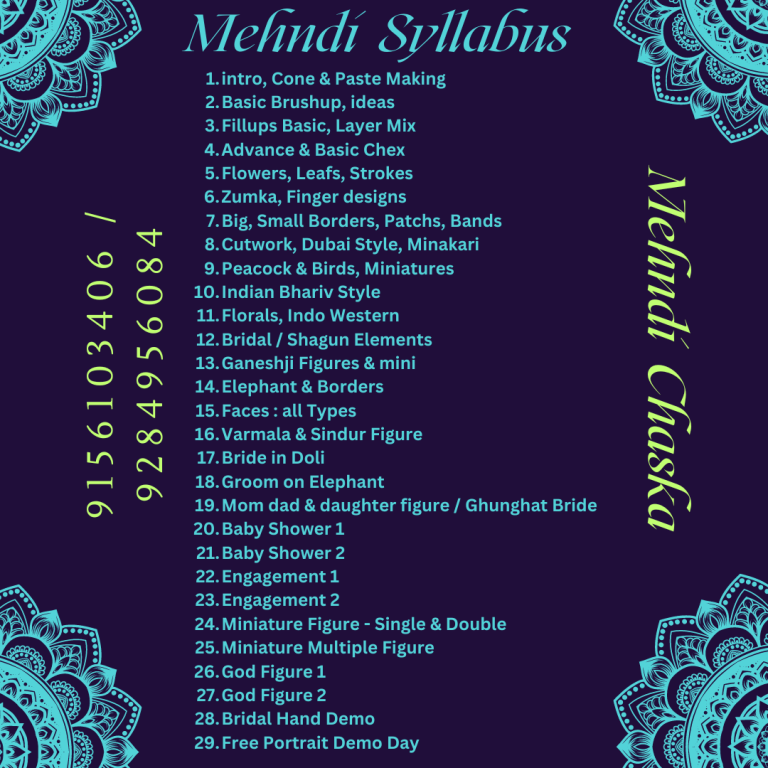
Mehndi Chaska Academy Comprehensive Henna Curriculum and Notes
Level 1: Beginner Level Henna
Day 1: Basics of Henna Application
Master the Basics of Henna Application: Cone Handling and Floral Designs
Learn essential henna techniques including how to hold the cone, apply pressure, and create beautiful moon and floral designs. Perfect for beginners seeking to perfect their skills.
How to Hold the Cone
Grip: Hold the henna cone like a pencil, ensuring a comfortable grip.
Control: Practice gentle pressure to control the flow of henna.
Angle: Keep the cone at a 45-degree angle to achieve smooth lines.
Pressure Techniques
Consistent Pressure: Ensure a steady pressure to maintain uniformity in designs.
Varying Pressure: Learn to adjust pressure for different line thicknesses and patterns.
Moon Flower Design
Basic Shape: Start with a circular base.
Petals: Add curved lines to create petals around the circle.
Floral Flowers
Central Circle: Draw a small circle.
Petal Addition: Surround the circle with evenly spaced petals.
Perfect Size and Shapes
Proportion: Practice creating flowers of various sizes to fit different design areas.
Symmetry: Focus on achieving symmetry in each design element.
Airlines
Definition: Thin, continuous lines used to connect elements or create borders.
Technique: Use light pressure to maintain a steady, fine line.
Day 2: Advanced Patterns and Filling Techniques
Advanced Henna Patterns: Check Boxes, Reverse Filling, and Petal Shapes
Enhance your henna skills with five types of check boxes, two reverse filling methods, and mastering various petal shapes. Ideal for budding henna artists.
5 Types of Check Boxes
Basic Grid: Simple square grid pattern.
Diagonal Check: Diagonal lines creating diamond shapes.
Double Line: Two lines forming each box.
Shaded Check: Filling alternate boxes with henna.
Cross Hatch: Intersecting lines for a textured effect.
2 Types of Reverse Filling
Outline and Fill: Outline the shape and fill the surrounding area, leaving the shape empty.
Pattern Fill: Create intricate patterns inside the shape while leaving the background blank.
Shapes of Petals
Round: Classic curved petals.
Pointed: Sharp, angular petals.
Teardrop: Petals with a rounded end tapering to a point.
Day 3: Shading and Bunches
Master Shading Techniques and Create Beautiful Henna Bunches
Learn various shading techniques, create five different bunches, and explore three unique flowers in henna design. Perfect for detailed and intricate artwork.
Different Types of Shading Techniques
Gradient Shading: Gradual change from dark to light within a shape.
Dot Shading: Using dots to create a shading effect.
Line Shading: Parallel lines for shading.
5 Different Types of Bunches
Simple Cluster: Small group of flowers.
Vine Bunch: Flowers along a vine.
Circular Bunch: Flowers arranged in a circle.
Mixed Bunch: Various flowers grouped together.
Layered Bunch: Overlapping flowers for a 3D effect.
3 Different Types of Flowers
Rose: Spiral center with layered petals.
Lotus: Broad petals around a central point.
Sunflower: Dense, short petals radiating from the center.
3 Types of 1-Inch Reverse Fillings
Star Fill: Central star with surrounding patterns filled in.
Heart Fill: Outline heart shape with patterned fill.
Leaf Fill: Leaf shape left empty with background filled.
Day 4: Leaves and Vines
Detailed Henna Leaves and Vines: Techniques and Applications
Discover techniques for drawing different types of vines and leaves, including five types of floral leaves, bold leaves, and connecting elements. Essential for intricate henna designs.
Different Types of Vines and Leaves
Basic Vine: Simple curved line with small leaves.
Flowering Vine: Vines with interspersed flowers.
Twisted Vine: Vines that twist and turn.
Leafy Vine: Dense leaves along a vine.
Floral Leaves: Leaves with floral patterns.
5 Types of Leaves for Florals
Simple Leaf: Basic teardrop shape.
Serrated Leaf: Edged with small serrations.
Veined Leaf: Detailed with veins.
Rounded Leaf: Smooth, rounded edges.
Elongated Leaf: Long, thin shape.
Bold Leaves
Technique: Use thicker lines and more henna for a bold appearance.
Application: Ideal for statement designs or focal points.
Connecting Elements
Lines and Swirls: Simple lines or swirls to connect different design elements.
Dotted Lines: Fine, dotted lines for a delicate connection.
Detailing Gulf Flowers
Intricate Patterns: Focus on small, detailed patterns within flowers.
Layering: Add depth by layering patterns within petals.
Day 5: Indian Bridal Fillings and Gulf Flowers
Indian Bridal Henna Fillings and Gulf Flower Designs
Learn Indian bridal fillings, five types of buds, and explore Gulf flower designs to enhance your henna artistry. Perfect for creating intricate bridal designs.
Indian Bridal Fillings and Fillers
Dense Patterns: Use intricate, close-packed designs for bridal henna.
Motifs: Incorporate traditional Indian motifs such as peacocks, paisleys, and flowers.
5 Types of Buds
Closed Bud: Simple teardrop shape.
Half-Open Bud: Slightly opened bud with visible petals.
Clustered Bud: Group of small buds together.
Long Bud: Elongated shape.
Layered Bud: Multiple layers of petals.
5 Types of Gulf Flowers
Rose Style: Layered petals with a central swirl.
Star Flower: Star-shaped petals.
Tulip Style: Broad petals with a cup shape.
Petite Blossom: Small, simple flower.
Frilled Flower: Petals with frilled edges.
Day 6: Test (Theory and Practical)
Beginner Henna Design Test: Theory and Practical Assessment
Assess your henna skills with a comprehensive test covering theory and practical application. Ideal for beginners ready to showcase their knowledge and techniques.
Theory Test: Written test covering all techniques learned.
Practical Test: Hands-on application of designs on practice materials.
Level 2: Intermediate Level Henna Design
Day 1: Mandala and Floral Henna
Intermediate Henna Design: Mandalas and Floral Patterns
Dive into mandala and floral henna designs, including finger henna techniques. Perfect for intermediate artists looking to enhance their skill set.
Mandala
Central Point: Start with a central dot.
Symmetry: Create symmetrical patterns radiating from the center.
Layering: Add multiple layers of intricate patterns.
Floral Mandala
Combining Elements: Integrate flowers into the mandala design.
Balanced Patterns: Ensure floral elements are evenly spaced.
Finger Henna Design
Simple Bands: Start with basic lines and dots.
Intricate Patterns: Add more detailed designs as you progress up the finger.
Day 2: Construction Formulas for Floral Designs
Floral Design Construction Formulas: Enhancing Henna Patterns
Learn two essential construction formulas for creating beautiful floral henna designs. Ideal for intermediate artists seeking structured design techniques.
Construction Formula 1: Floral Design
Base Flower: Start with a central flower.
Secondary Elements: Add leaves and smaller flowers around the base.
Balance: Ensure even distribution of elements.
Construction Formula 2: Floral Design
Interconnected Flowers: Create a network of flowers connected by vines.
Layering: Use layers to add depth and complexity.
Day 3: Reverse Filling and Trending Designs
Master Reverse Filling and Indian Trending Henna Designs
Perfect the art of reverse filling and explore trending Indian henna designs. Ideal for intermediate artists looking to stay ahead in henna trends.
Reverse Filling
Outline Technique: Draw the outline of a shape and fill the surrounding area.
Pattern Inside: Create intricate patterns within the shape, leaving the outline blank.
Reverse Filling and Checks
Combination: Integrate reverse filling with check patterns for a unique look.
Indian Trending Designs
Modern Motifs: Explore current popular motifs in Indian henna.
Fusion Designs: Combine traditional and modern elements.
Day 4: Gulf Construction and Floral Gulf Designs
Gulf Henna Construction: Khafeef and Floral Designs
Learn Gulf henna construction techniques including Khafeef and floral designs. Ideal for intermediate artists focusing on Gulf henna styles.
Gulf Construction
Flowing Patterns: Emphasize fluid, flowing designs.
Intricate Details: Focus on small, detailed elements.
Khafeef
TERMS AND CONDITION OF OUR ACADEMY
- COMPLETE PAYMENT SHOULD BE MADE BEFORE COMMENCING OF THE COURSE
- THE PAYMENT IS STRICTLY NON REFUNDABLE
- YOU CAN GET EITHER JOIN THE MORNING OR THE EVENING BATCHES BUT NOT BOTH
- SCHEDULE FOR CLASSES WILL BE DECIDED BY INSTRUCTOR. AND THERE IS NO CHANCE OF NEGOTIATION / COMPENSATING THE CLASSED OR ANY KIND OF ACCOMMODATION FOR ABSENTEES OR REGISTER ONLY IF YOU HAVE TIME TO PRACTICE.
- RECORD HOME WORK SUBMISSION IS A MUST TO RECEIVE CERTIFICATES
- CERTIFICATES WILL BE PROVIDED ONLY BASED ON THE PERFORMANCE OF THE STUDENT.
ALL COURSE FEES MUST BE PAID IN FULL BEFORE THE COURSE COMMENCEMENT DATE
8. FEES ARE NON REFUNDABLE ONCE THE COURSE HAS STARTED
9. STUDENTS ARE RESPONSIBLE FOR ACQUIRING ANY NECESSARY MATERIALS OR SUPPLIES FOR THE COURSE ASOUTLINED IN THE COURSE DESCRIPTION.
10. ALL COURSE MATERIAL, INCLUDING NOTES , VIDEOS, HANDOUTS AND INSTRUCTIONAL CONTENT ARE THE INTELLECTUAL PROPERTY OF MEHNDI CHASKA ACADEMY.
11. UNAUTHORIZED DISTRIBUTION OR SHARING OF COURSE MATRIALS IS PROHIBITED.
12. ANY DISRUPTIVE OR INAPPROPRIATE BEHAVIOUR MAY RESULT IN REMOVAL FROM THE COURSE WITHOUT A REFUND.
13. STUDENTS WILL BE EVALUATED ABASED ON THEIR PERFORMANCE IN TEST AND ASSIGNMENTS. GRADING CRITERIA WILL BE EXPLAINED DURING THE COURSE.
14. MEHNDI CHASKA ACADEMY RESERVES THE RIGHT TO CANCEL OR RESHEDULE THE COURSE IN EXCEPTIONAL CIRCUMSTANCES.
15. IN CASES OF COURSE CANCELLATION, THE COURSE FEE WILL BE TRANSFERRED TO THE NEXT UPCOMING COURSE.
16. A CERTIFICATE OF COMPLETION WILL BE PROVIDED TO STUDENTS WHO SUCESSFULLY COMPLETE THE COURSE AS PER THE CRITERIA OUTLINED DURING THE COURSE.
17. BY ENROLLING IN MEHNDI CHASKA ACADEMY YOU AGREE TO ADHERE TO
18. THESE TERMS AND CONDITIONS. PLEASE READ AND UNDERSTAND THEM THOROUGHLY BEFORE PROCEEDING WITH YOUR ENROLLMENT.
MEHNDI CHASKA
9156103406 / 9284956084
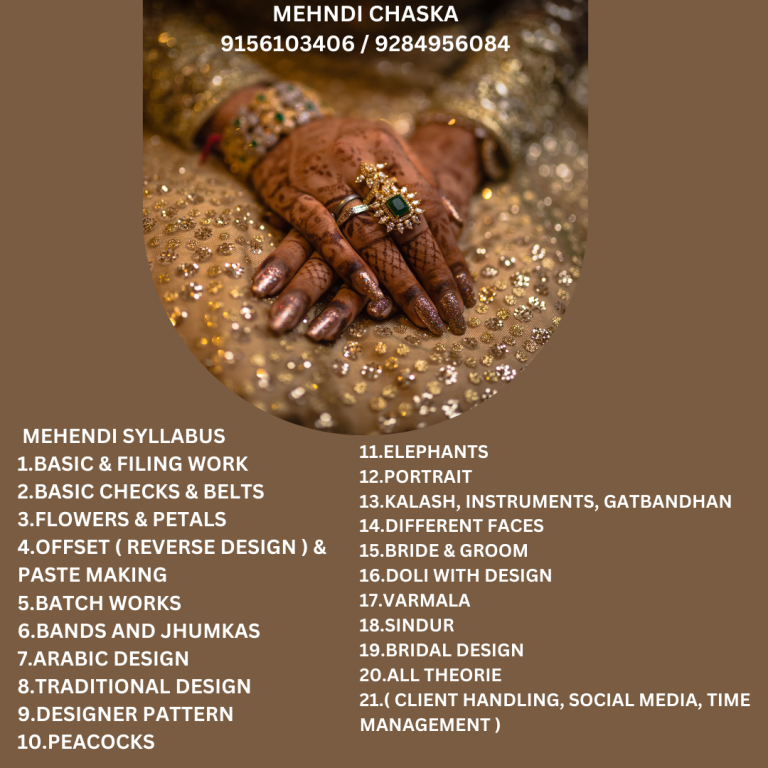
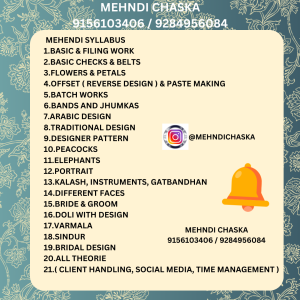
ONLINE MEHENDI SYLLABUS
1. BASIC & FILING WORK
2. BASIC CHECKS & BELTS
3. FLOWERS & PETALS
4. OFFSET ( REVERSE DESIGN ) & PASTE MAKING
5. BATCH WORKS
6. BANDS AND JHUMKAS
7. ARABIC DESIGN
8. TRADITIONAL DESIGN
9. DESIGNER PATTERN
10. PEACOCKS
11. ELEPHANTS
12. PORTRAIT
13. KALASH, INSTRUMENTS, GATBANDHAN
14. DIFFERENT FACES
15. BRIDE & GROOM
16. DOLI WITH DESIGN
17. VARMALA
18. SINDUR
19. BRIDAL DESIGN
20. ALL THEORIE
21. ( CLIENT HANDLING, SOCIAL MEDIA, TIME MANAGEMENT )
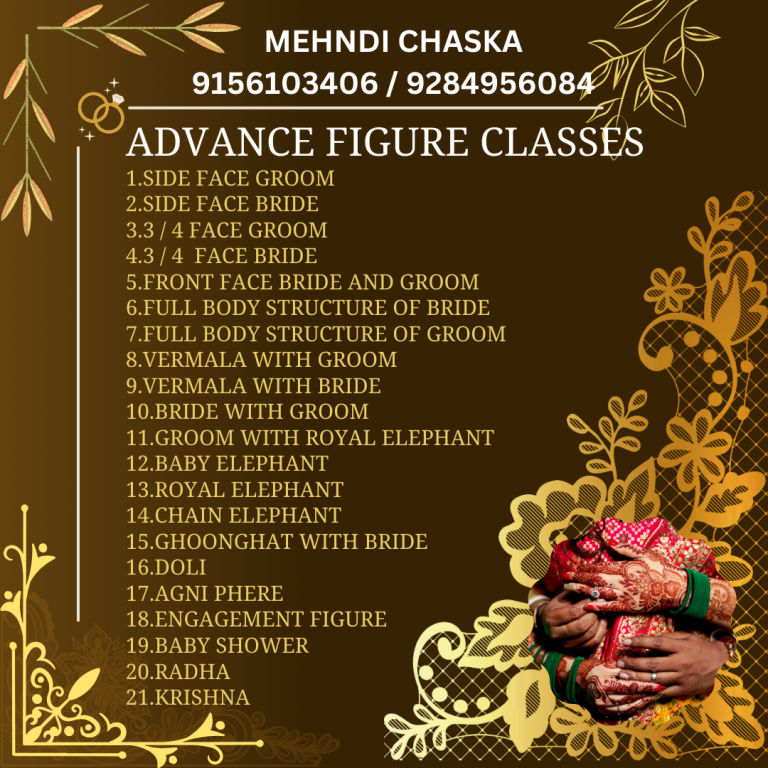
ADVANCE FIGURE CLASSES
- SIDE FACE GROOM
- SIDE FACE BRIDE
- 3 / 4 FACE GROOM
- 3 / 4 FACE BRIDE
- FRONT FACE BRIDE AND GROOM
- FULL BODY STRUCTURE OF BRIDE
- FULL BODY STRUCTURE OF GROOM
- VERMALA WITH GROOM
- VERMALA WITH BRIDE
- BRIDE WITH GROOM
- GROOM WITH ROYAL ELEPHANT
- BABY ELEPHANT
- ROYAL ELEPHANT
- CHAIN ELEPHANT
- GHOONGHAT WITH BRIDE
- DOLI
- AGNI PHERE
- ENGAGEMENT FIGURE
- BABY SHOWER
- RADHA
- KRISHNA
Advance Figure Classes:
Side Face Groom
Explore the intricate details of sketching a groom’s side profile. This tutorial covers facial features, beard styling, turban details, and the subtle expressions that bring a groom’s face to life. Ideal for wedding artists and illustrators.Side Face Bride
Learn how to draw a bride’s side profile, focusing on the delicate features, jewelry, and traditional bridal makeup. This lesson emphasizes the cultural significance and elegance of a bride’s appearance.3/4 Face Groom
Master the 3/4 angle, a popular perspective in figure drawing. This session will guide you through capturing the depth and character of a groom’s face, highlighting the facial structure and traditional attire.3/4 Face Bride
Capture the grace and poise of a bride from a 3/4 angle. This video covers the techniques to showcase jewelry, makeup, and the intricate details of bridal hairstyles in this classic pose.Front Face Bride and Groom
This dual tutorial focuses on drawing the front-facing portraits of both the bride and groom. Learn how to balance the compositions, detailing their attire, expressions, and the subtle interplay between their gazes.Full Body Structure of Bride
Step into the world of full-body figure drawing with a focus on the bride. This class covers posture, draping of the bridal lehenga or saree, jewelry placement, and the overall elegance of a bridal silhouette.Full Body Structure of Groom
Develop your skills in drawing a full-body groom figure. Emphasizing traditional attire such as sherwani or suit, this lesson also explores how to depict posture, stance, and ceremonial accessories like a sword or garland.Vermala with Groom
Illustrate the iconic moment of the groom wearing the vermala (garland). This video teaches how to depict the detailed garland, the groom’s attire, and the significance of this ceremonial act in wedding illustrations.Vermala with Bride
Focus on the bride’s perspective of the vermala exchange. This tutorial includes details on the bride’s attire, the movement of her hand as she places the garland, and the emotion captured in her posture and expression.Bride with Groom
Explore how to draw the couple together, capturing the bond and chemistry between them. This session covers body language, interlinked hands, and the harmony in their appearance, reflecting their union.Groom with Royal Elephant
Learn to depict the grandeur of the groom’s entrance on a royal elephant. This lesson focuses on the majestic details of the elephant, traditional decorations, and the groom’s regal stance.Baby Elephant
A whimsical session on drawing a baby elephant. Focus on the playful nature, smaller proportions, and the gentle features that make baby elephants so endearing in wedding art and cultural illustrations.Royal Elephant
Master the art of drawing a royal elephant, often featured in grand Indian weddings. This video covers the intricate designs of the elephant’s adornments, its majestic stature, and the cultural significance it holds.Chain Elephant
Explore how to depict a procession of elephants in a chain formation, a symbol of tradition and royalty. This session teaches the techniques to maintain consistency in their appearance while emphasizing their grandeur.Ghoonghat with Bride
Learn the delicate art of illustrating a bride under a ghoonghat (veil). This tutorial highlights the translucent quality of the veil, the modesty and mystery it adds to the bride’s appearance, and how to capture her expression beneath it.Doli
Capture the emotion and tradition behind the bride’s departure in a doli (palanquin). This session covers the intricate designs of the doli, the bride’s position within it, and the cultural significance of this moment.Agni Phere
Delve into the sacred ritual of the Agni Phere, where the couple walks around the holy fire. Learn to illustrate the movement, the symbolism of the fire, and the traditional attire that makes this ritual so iconic.Engagement Figure
Focus on the pre-wedding ceremony of engagement. This class teaches how to draw the couple exchanging rings, capturing the joy, the intricate details of the attire, and the intimate connection between them.Baby Shower
A session on illustrating the joyous occasion of a baby shower. Learn to depict the expectant mother, the traditional rituals, and the cultural elements that make this ceremony a celebration of life and new beginnings.Radha
Explore the divine beauty and grace of Radha. This tutorial focuses on her traditional attire, the expressive eyes, and the gentle demeanor that symbolizes love and devotion in Indian mythology.Krishna
Learn to draw Krishna, the epitome of charm and mischief. This video covers the details of his attire, the iconic flute, peacock feather, and the divine aura that surrounds this beloved deity.
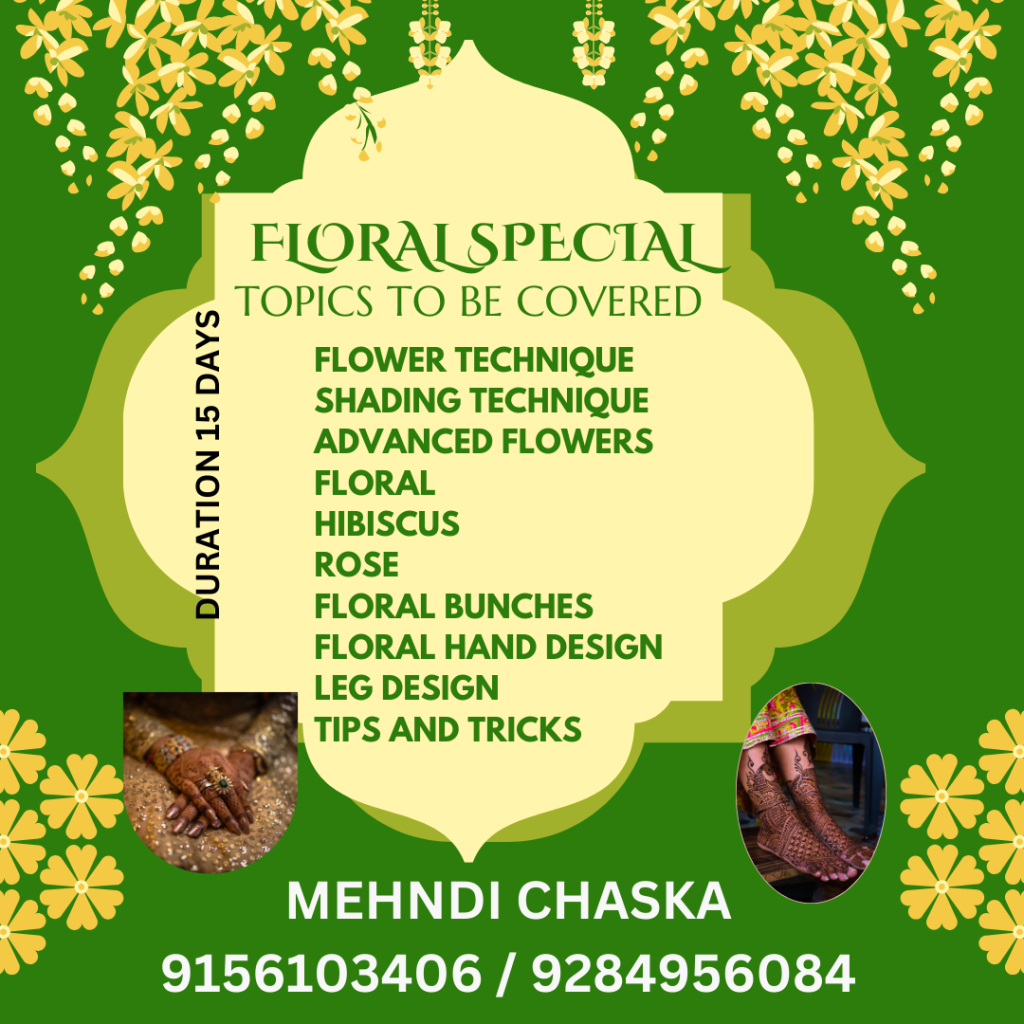
𝐁𝐚𝐬𝐢𝐜 𝐭𝐨 𝐀𝐝𝐯𝐧𝐚𝐜𝐞 𝐟𝐥𝐨𝐫𝐚𝐥 𝐦𝐚𝐬𝐭𝐞𝐫𝐜𝐥𝐚𝐬𝐬🍃
Mehendi Artist Classes Mehndi Course Design Academy Nagpur
👉🏻DATE – 26 Jan 2025
👉🏻Time – 6pm to 8 pm
👉🏻 per day – 1.5 hour
👉🏻Days – 30 days
👉🏻
👉🏻Platform – insta live & zoom meeting aap
👉🏻Language – Hindi
👉🏻
👉🏻 E – certificate provides
👉🏻 DM FOR REGISTRATION ✅
👉🏻 Limited slots available 💯
♦️𝐓𝐨𝐩𝐢𝐜𝐬 ♦️
✅1. some Basic eliments
✅2. Grids designs
✅3. Arebic hand designs
✅4.Basic henna flowers
✅5. Flowers making formula
✅6. Important flowers rules
✅7. Basic shading techniques
✅8. Advance shading techniques
✅9. Different type of pattel designs
✅11. Different type of leaves
✅12. Vines & Drops
✅13. Shading leaves
✅14. Shading flowers
✅15. Dubai flowers
✅16. Khafif flowers
✅17. types of Hibiscus flowers
✅18. Basic floral bunches
✅19. Advance floral bunches
✅20. Khafif floral bunches
✅21. Heavy floral bunches
✅22. Dubai floral strips designs
✅23. Designer hands
✅24. Floral hand strip
✅25. Floral bunches hands
✅26. Dubai designer hands
✅27. Khafif Hand designings
✅28. How to connect your design
✅29. How to make your own design
✅30. How to make design like a professional 🌿
𝙊𝙣𝙡𝙮 𝙞𝙣𝙩𝙚𝙧𝙚𝙨𝙩𝙚𝙙 𝙥𝙚𝙤𝙥𝙡𝙚 𝙘𝙤𝙣𝙩𝙖𝙘𝙩 𝙢𝙚 🍃✨🌸
WhatsApp :- 📞 9156103406
Follow this account for demo classes :-
Mehendi Artist Classes Mehndi Course Design Academy Nagpur
9156103406 / 9284956084
If you are interested then msg me
*mehendi chaska art *
Designing
****
-🔹Cone making knowledge
-🔹Paste making knowledge
-🔹Creative line designs
-🔹Different grid
-🔹Creative belts
-🔹wedding symbols
-🔹Realistic floral
– 🟢swan
-🔹Peacock
-🔹Elephant
-🔹Parrot
-🔹Creative motifs
-🔹and many more
🟢Figures
-🔹all figures from real photography
Like
-🔹Side face bride
-🔹Side face groom
-🔹3/4 face bride
-🔹3/4 face groor
-🔹Front face bri
-🔹Front face groom
-🔹Bride with ghunghat
-🔹full figure praportion explanation
-🔹wedding ritual figures
Like (Varmala,sindur,fera)
-🔹indian couple
-🔹western couple
-🔹Radha
-🔹Krishna
-🔹Barat (with miniature)
-🔹Doli (with miniature)
-🔹2 days portrait
-🔹demo on hand
-🔹 certificate day
/////////////////////////////////////////
🌿*Bridal Course Season *🌿
(*Basic-Advace-Bridal-Portrait*)
Starting 12 May (11am-12:30pm ist)
*Daily Homework check and Guidance* also *e- Certificates*
Syllabus:
Day 1: Basics , Paste Making
Day 2: Filing work
Day 3: Basic of Checks
Day 4: Flowers & Petals
Day 5: Cutwork / Offset
Day 5: Patch work / Startup Design
Day 6: Arabic & Kafif Pattern
Day 7: Traditional Pattern
Day 8: Advance Checks
Day 9: Designer Pattern
Day 10: Peacocks & Mini peacocks
Day 11: Royal Startup designs (castles)
Day 12: Semi Bridal
Day 13: Basics of Figures
Day 14: 3/4 body Bridal & Groom (front face , side face , 3/4 face )
Day 15: full body, Varma + Sindur
Day 16: wedding elements + Bride Doli
Day 17: Radha-Krishna + Ganesh Ji
Day 18: Shiv- Parvati + Gau Maa
Day 19: Engagement + Godhbharai
Day 20: Bridal Entry + Bride Bidai
Day 21: Portraits
Day 22: Sanjhi Art
Day 23: Basic Floral Bridal Design
Day 24: Floral Bridal Back hand
Day 25: Figure Bridal Design with Ghungat Bride
Day 26: leg design
Day 27: Royal Bridal Design
Day 28: Heavy Non- Figures Bridal Design
Day 29: Social Media + Client Handling
Day 30: QA
*Registration*
Pay on 9284956084
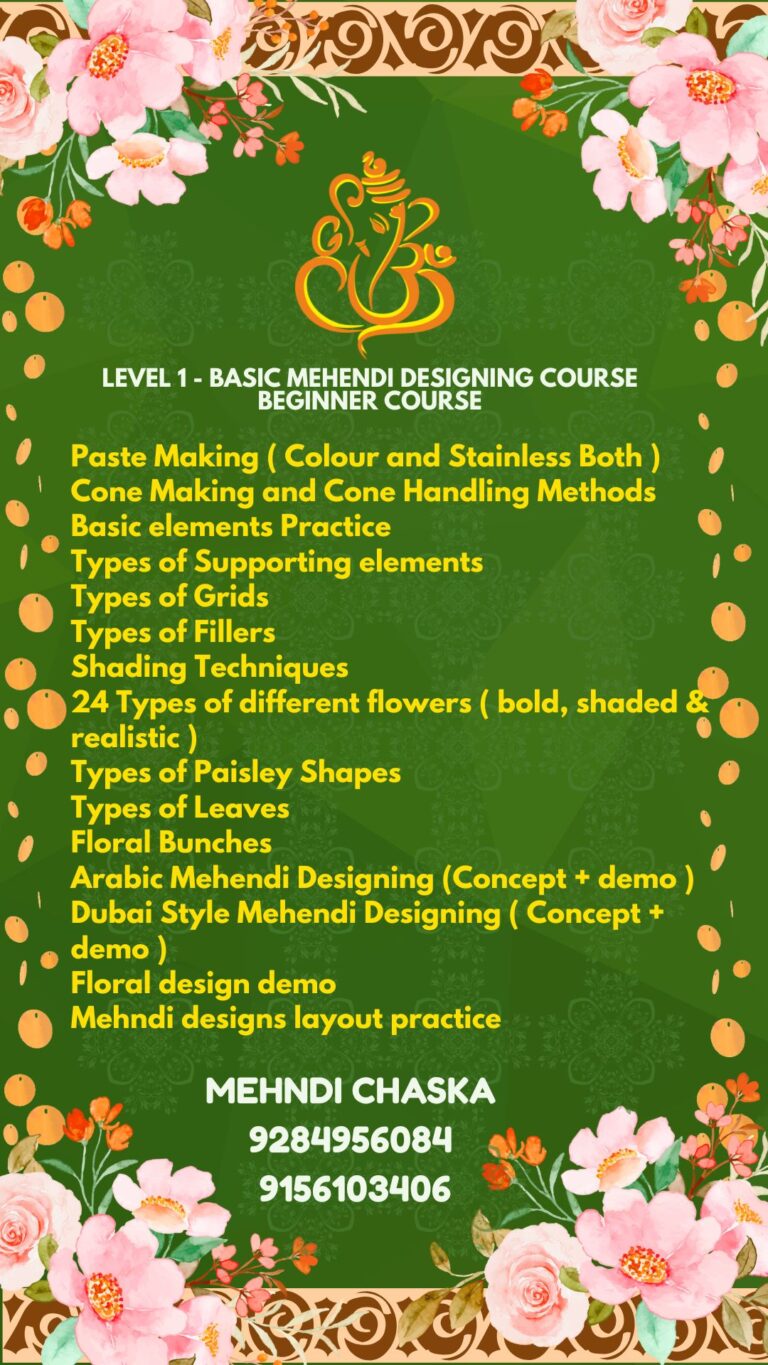
LEVEL 1 – BASIC MEHENDI DESIGNING COURSE
BEGINNER COURSE
Paste Making ( Colour and Stainless Both )
Cone Making and Cone Handling Methods
Basic elements Practice
Types of Supporting elements
Types of Grids
Types of Fillers
Shading Techniques
24 Types of different flowers ( bold, shaded & realistic )
Types of Paisley Shapes
Types of Leaves
Floral Bunches
Arabic Mehendi Designing (Concept + demo )
Dubai Style Mehendi Designing ( Concept + demo )
Floral design demo
Mehndi designs layout practice
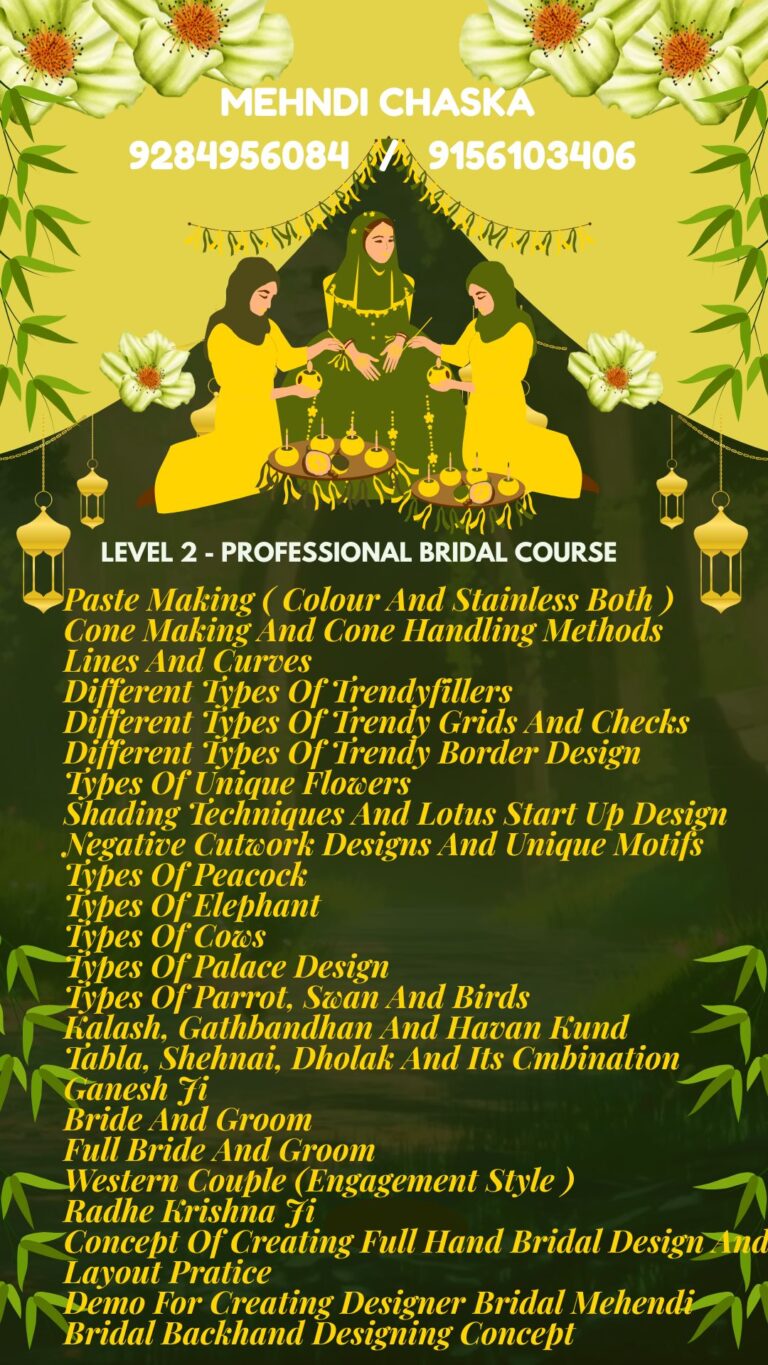
Level 2 – PROFESSIONAL BRIDAL COURSE
Paste Making ( Colour And Stainless Both )
Cone Making And Cone Handling Methods
Lines And Curves
Different Types Of Trendyfillers
Different Types Of Trendy Grids And Checks
Different Types Of Trendy Border Design
Types Of Unique Flowers
Shading Techniques And Lotus Start Up Design
Negative Cutwork Designs And Unique Motifs
Types Of Peacock
Types Of Elephant
Types Of Cows
Types Of Palace Design
Types Of Parrot, Swan And Birds
Kalash, Gathbandhan And Havan Kund
Tabla, Shehnai, Dholak And Its Cmbination
Ganesh Ji
Bride And Groom
Full Bride And Groom
Western Couple (Engagement Style )
Radhe Krishna Ji
Concept Of Creating Full Hand Bridal Design And
Layout Pratice
Demo For Creating Designer Bridal Mehendi
Bridal Backhand Designing Concept
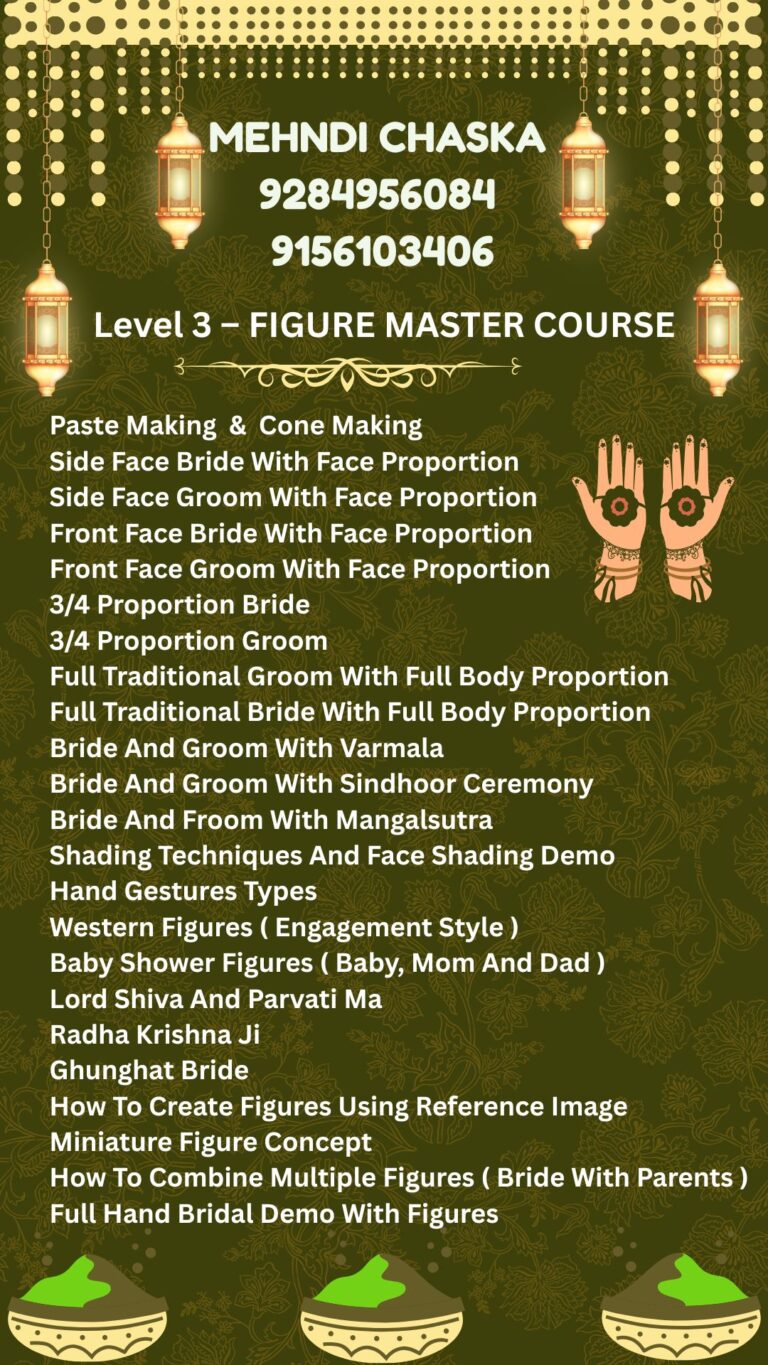
Level 3 – FIGURE MASTER COURSE
Paste Making And Cone Making
Side Face Bride With Face Proportion
Side Face Groom With Face Proportion
Front Face Bride With Face Proportion
Front Face Groom With Face Proportion
¾ Proportion Bride
¾ Proportion Groom
Full Traditional Groom With Full Body Proportion
Full Traditional Bride With Full Body Proportion
Bride And Groom With Varmala
Bride And Groom With Sindhoor Ceremony
Bride And Froom With Mangalsutra
Shading Techniques And Face Shading Demo
Hand Gestures Types
Western Figures ( Engagement Style )
Baby Shower Figures ( Baby, Mom And Dad )
Lord Shiva And Parvati Ma
Radha Krishna Ji
Ghunghat Bride
How To Create Figures Using Reference Image
Miniature Figure Concept
How To Combine Multiple Figures ( Bride With Parents )
Full Hand Bridal Demo With Figures
Best Online Mehendi Designing Course for Beginners to Bridal Level in India
Professional Bridal Mehendi Course – Learn From Basic to Advanced Figures
Figure Mastery in Mehndi | Learn Side & Front Face Bride Groom Designs
Top Mehendi Classes in India | Learn Arabic, Dubai & Bridal Mehndi Online
Bridal Mehendi Course with Live Demo | Online & Offline Mehndi Classes
Learn Mehendi Designing Step-by-Step | From Cone Making to Bridal Art
Master the Art of Mehndi | Full Hand Bridal Mehendi with Figures
Best Mehndi Course in India | Certified Online & Offline Mehndi Academy
Beginner to Expert Mehendi Course | 3 Levels Training + Certification
Learn Professional Mehndi Designing from Home | Start a Career in Mehendi
Online Arabic Mehendi Classes with Certificate | Dubai & Floral Styles
Full Bridal Mehndi Tutorial | Bride Groom, Radha Krishna & Peacock Figures
Top Mehendi Designing Institute in India | Full Course with Demo
3 Level Certified Mehendi Course | Basic, Bridal & Figure Training
Online Mehendi Classes | From Shading to Full Bridal Layout Design
Mehndi Class for Beginners to Advanced | Learn 24 Types of Flowers
Professional Mehendi Designing Academy | Indian & Western Concepts
Live Bridal Mehendi Course | Learn Realistic, Shaded & Bold Designs
Learn How to Create Mehendi Figures | Western, Wedding & Religious Art
Best Bridal Mehendi Course Online in Hindi & English
Top Mehendi Course with Certification | Join Now – Online & Offline
Complete Mehendi Artist Course | Become a Certified Mehendi Designer
Learn Mehendi Cone Making, Paste, Shading & Layout in 1 Course
How to Draw Bride Groom in Mehendi | Face Proportion & Gesture Training
Step-by-Step Mehendi Training for Beginners | Online Certified Course
Best Bridal Mehendi Course for Wedding Season 2025
Miniature Figure Art in Mehendi | Professional Figure Drawing Techniques
Learn Indian Traditional Mehendi | Full Course with Figure Practice
Start Your Mehendi Career | Professional Course with Bridal Demo
Online Mehendi Classes in India | Basic to Advanced Figure Drawing
Top Mehendi Academy for Bridal Designing & Groom Figures
Best Mehndi Course for Beginners | Shading, Paisley & Floral Bunches
Certified Online Mehendi Training Course | Start Earning from Home
Full Body Bride Groom Mehendi Drawing Course | Join Today
Ganesh Ji, Kalash, Dholak, and Marriage Themes in Mehendi
Learn Varmala & Sindhoor Ceremony in Mehendi Figures
Arabic & Dubai Style Mehendi Course | Step-by-Step Design Demos
Top Online Mehendi Institute in India for Students & Housewives
Create Full Bridal Mehendi with Multiple Figures | Live Workshop
Advance Mehndi Classes Online | Wedding Theme & Festival Designs
Learn Face Shading & Proportion in Mehndi Figures
Western Couple Mehendi Design | Engagement Figure Art Tutorial
Learn to Combine Bride & Parents Figures in Bridal Mehendi
Shiva Parvati, Radha Krishna Mehendi Course | Spiritual Figure Art
Professional Mehndi Artist Training Course | Enroll Online
How to Create Full Bridal Layout in Mehendi Step-by-Step
Get Certified in Mehendi Designing | Full Course from Home
Traditional Indian Bridal Mehendi with Groom, Elephant & Peacock
Best Online Mehendi Class for Housewives, Students & Artists
Mehendi Class with Free Demo | Join Now for Bridal, Figure & Floral Designs
Mehndi Course Online
Mehendi Classes in India
Bridal Mehendi Tutorial
Mehndi Designing Course
Certified Mehendi Artist
Learn Mehndi at Home
Professional Mehendi Training
Arabic Mehendi Course
Bridal Figure Mehndi Drawing
Indian Wedding Mehendi Course
#MehndiCourse #BridalMehendi #LearnMehndiOnline #MehendiArtistIndia #FigureMehendi #MehndiClasses #ArabicMehendiDesigns #DubaiMehendi #OnlineMehndiCourse #CertifiedMehndiArtist #WeddingMehendi #MehndiClassIndia #MehndiDesignTutorial #FullHandBridalMehendi #RadhaKrishnaMehndi
Mehndi Chaska 9156103406 / 9284956084 offers India’s most complete and professional Mehendi Designing Course online and offline. Our course is divided into 3 levels for every learner – Level 1: Basic Mehendi Designing Course, Level 2: Professional Bridal Course, Level 3: Figure Master Course. In the Beginner Course (Level 1), we cover Paste Making (Colour and Stainless Both), Cone Making and Cone Handling Methods, Basic Elements Practice, Types of Supporting Elements, Types of Grids, Types of Fillers, Shading Techniques, 24 Types of Different Flowers (Bold, Shaded & Realistic), Types of Paisley Shapes, Types of Leaves, Floral Bunches, Arabic Mehendi Designing (Concept + Demo), Dubai Style Mehendi Designing (Concept + Demo), Floral Design Demo, and Mehndi Designs Layout Practice. In the Professional Bridal Course (Level 2), students learn advanced Bridal Art including Paste Making, Cone Handling, Lines and Curves, Trendy Fillers, Trendy Grids and Checks, Border Designs, Unique Flowers, Shading and Lotus Design, Negative Cutwork, Motifs, Types of Peacock, Elephant, Cow, Palace Designs, Birds (Parrot, Swan), Kalash, Gathbandhan, Havan Kund, Tabla, Shehnai, Dholak, Ganesh Ji, Bride and Groom, Full Bride and Groom, Western Couple (Engagement Style), Radhe Krishna, Full Hand Bridal Layout Practice, Bridal Demo, and Backhand Designing. The Figure Master Course (Level 3) includes everything from Face and Body Proportions of Bride and Groom (Side, Front, and ¾ Views), Full Traditional Bride and Groom with Full Body Proportion, Varmala Scene, Sindhoor Ceremony, Mangalsutra Ritual, Shading Techniques, Face Shading Demo, Hand Gestures, Western Figures, Baby Shower Figures (Mom, Dad, Baby), Lord Shiva and Parvati Ma, Radha Krishna Ji, Ghunghat Bride, Creating Figures from Reference Image, Miniature Figure Concept, Combining Multiple Figures (Bride with Parents), and Full Hand Bridal Demo with Figures. This course helps learners become Certified Professional Mehndi Artists from Home and start their own business. Best Online Mehendi Designing Course for Beginners to Bridal Level in India, Professional Bridal Mehendi Course – Learn From Basic to Advanced Figures, Figure Mastery in Mehndi Learn Side & Front Face Bride Groom Designs, Top Mehendi Classes in India Learn Arabic, Dubai & Bridal Mehndi Online, Bridal Mehendi Course with Live Demo Online & Offline Mehndi Classes, Learn Mehendi Designing Step-by-Step From Cone Making to Bridal Art, Master the Art of Mehndi Full Hand Bridal Mehendi with Figures, Best Mehndi Course in India Certified Online & Offline Mehndi Academy, Beginner to Expert Mehendi Course 3 Levels Training + Certification, Learn Professional Mehndi Designing from Home Start a Career in Mehendi, Online Arabic Mehendi Classes with Certificate Dubai & Floral Styles, Full Bridal Mehndi Tutorial Bride Groom, Radha Krishna & Peacock Figures, Top Mehendi Designing Institute in India Full Course with Demo, 3 Level Certified Mehendi Course Basic, Bridal & Figure Training, Online Mehendi Classes From Shading to Full Bridal Layout Design, Mehndi Class for Beginners to Advanced Learn 24 Types of Flowers, Professional Mehendi Designing Academy Indian & Western Concepts, Live Bridal Mehendi Course Learn Realistic, Shaded & Bold Designs, Learn How to Create Mehendi Figures Western, Wedding & Religious Art, Best Bridal Mehendi Course Online in Hindi & English, Top Mehendi Course with Certification Join Now – Online & Offline, Complete Mehendi Artist Course Become a Certified Mehendi Designer, Learn Mehendi Cone Making, Paste, Shading & Layout in 1 Course, How to Draw Bride Groom in Mehendi Face Proportion & Gesture Training, Step-by-Step Mehendi Training for Beginners Online Certified Course, Best Bridal Mehendi Course for Wedding Season 2025, Miniature Figure Art in Mehendi Professional Figure Drawing Techniques, Learn Indian Traditional Mehendi Full Course with Figure Practice, Start Your Mehendi Career Professional Course with Bridal Demo, Online Mehendi Classes in India Basic to Advanced Figure Drawing,
Top Mehendi Academy for Bridal Designing & Groom Figures, Best Mehndi Course for Beginners Shading, Paisley & Floral Bunches, Certified Online Mehendi Training Course Start Earning from Home, Full Body Bride Groom Mehendi Drawing Course Join Today, Ganesh Ji, Kalash, Dholak, and Marriage Themes in Mehendi, Learn Varmala & Sindhoor Ceremony in Mehendi Figures, Arabic & Dubai Style Mehendi Course Step-by-Step Design Demos, Top Online Mehendi Institute in India for Students & Housewives, Create Full Bridal Mehendi with Multiple Figures Live Workshop, Advance Mehndi Classes Online Wedding Theme & Festival Designs, Learn Face Shading & Proportion in Mehndi Figures, Western Couple Mehendi Design Engagement Figure Art Tutorial, Learn to Combine Bride & Parents Figures in Bridal Mehendi, Shiva Parvati, Radha Krishna Mehendi Course Spiritual Figure Art, Professional Mehndi Artist Training Course Enroll Online, How to Create Full Bridal Layout in Mehendi Step-by-Step, Get Certified in Mehendi Designing Full Course from Home, Traditional Indian Bridal Mehendi with Groom, Elephant & Peacock, Best Online Mehendi Class for Housewives, Students & Artists, Mehendi Class with Free Demo Join Now for Bridal, Figure & Floral Designs
Basic Dots & Lines – practice strokes (straight, curved, zigzag).
Leaf Patterns – small leaves, clustered leaves, shaded leaves.
Floral Designs – simple flowers, layered petals.
Paisley (Mango) Motif – step by step filling.
Mandala Practice – circular balance design.
Fingers Mehendi – line, dots, ring styles on fingers.
Wrist & Bracelet Design – chain, bangle, and band designs.
Arm Fillings – diagonal, cross-line, mesh, jaali patterns.
Peacock Motif – outline and filling.
Bridal Detailing – fine line work, miniature motifs.
Shading & Filling – how to shade with cone pressure.
Full Hand Layout – composition from wrist to fingers.
Bel (Creeper) Designs – vines with leaves/flowers.
Jaali (Net) Work – crisscross mesh patterns.
Arabic Style Strips – flowing floral trails.
Modern Geometric Patterns – triangles, diamonds, symmetry.
Finger Ring Chains – connecting ring styles.
Lotus Motif – step by step.
Shaded Roses – layered petal roses.
Bangle Designs – stacked round wrist styles.
Animal Motifs – elephant, bird outlines.
Name Initials / Hidden Text – how to hide names in design.
Mandala Borders – half mandalas, side fillers.
Full Bridal Arm Design – composition up to elbow.
Finger Tip Fillings – bold tips, shading, finger-end designs.
Checkered Patterns – boxes with floral fillers.
Mesh + Dot Fillers – net with dotted balance.
Side Bel Layouts – vines from wrist to finger sides.
Fusion Motifs – combining flower + paisley + leaf.
Geometric Borders – zigzag, triangular, and diamond borders.
Arabic + Indian Fusion – flowing trail with Indian filling.
Mandala Variations – quarter mandala, half mandala, layered mandala.
Wrist Watch Style Mehendi – circle + strap design on wrist.
Shoulder/Back Motifs – simple motifs beyond hand.
Bridal Foot Mehendi – sole + ankle filling designs.
Kids Mehendi Patterns – simple stars, hearts, butterflies.
Finger Tip Crown Designs – ornamental caps on finger ends.
Jewellery Mehendi – necklace, earrings, anklet styles in mehendi form.
Portrait/Face Outlines – simple bride–groom sketch in mehendi.
Mandala with Shading – dark-light shading practice inside circles.
3D Effect Designs – layered strokes for raised effect.
Butterfly & Insect Motifs – tiny fillers like butterflies, bees.
Spiral & Swirl Practice – round movement control drills.
Temple Motif – dome, kalash, bells in mehendi form.
Storytelling Panels – mini-scenes (dhol, palki, wedding icons).
Modern Minimal Mehendi – single-line elegant designs.
Festival Specific – Diwali diya, Eid moon-star, Karwa Chauth thali.
Finger Knuckle Rings – mini-bands across knuckles.
Gothic/Abstract Fillers – unusual sharp fillers for practice.
Negative Space Designs – practice leaving empty shapes.
Advanced Bridal Feet – full sole + toe detailing.
Animal Silhouette Motifs – camel, horse, swan outlines.
Tribal/Warli Style Mehendi – stick-figure tribal art inside motifs.
Architectural Patterns – arches, jharokhas, palace domes.
Rangoli-inspired Mehendi – rangoli-style circular fillers.
Henna Mandala with Layers – multiple rings of patterns in one.
Lace Pattern Practice – thin, delicate mesh like lace fabric.
Henna Tattoo Style – bold single motif (moon, feather, anchor).
Jewelled Hathphool Style – chain + central motif like hand jewelry.
Fabric Texture Imitation – mehendi mimicking saree/lehenga borders.
Ocean Theme – waves, fish, shells.
Nature Theme – trees, mountains, sun.
Bridal Symbols – sindoor, mangalsutra, kalirey.
Regional Styles – Rajasthani vs. Moroccan vs. Gulf Arabic patterns.
Mehendi Borders for Feet Anklets – ghungroo, bells, lotus anklets.
Tattoo Fusion Practice – dragonfly, angel wings, dreamcatcher in mehendi.
Henna Shading with Cone Angles – same motif with thin, medium, thick shading.
Optical Illusion Mehendi – patterns creating 3D cubes or waves.
Mirror Image Practice – left/right hand identical layouts.
Circular Flow Designs – spiral trails around wrist or palm center.
Fusion of Cultures – Indo-Moroccan, Indo-Turkish patterns.
Astrology/Planet Motifs – sun, moon, stars, zodiac signs.
Mehendi Calligraphy – alphabets, monograms in henna style.
Nature Elements – raindrops, clouds, lightning fillers.
Mechanical/Steampunk Style – gears, chains, clock patterns.
Tattoo-Mimic Mehendi – dragon, phoenix, abstract flames.
Dance & Music Motifs – dhol, sitar, tabla, musical notes.
Jewelled Anklet Practice – ghungroo + chain detailing for feet.
Fabric-Inspired Borders II – Banarasi, Bandhani, Zari imitation.
Miniature Scene Work – baraat procession, palki, horse rider.
Henna Healing Symbols – om, lotus, chakra symbols.
Reverse Mehendi – using empty (negative) outline motifs instead of filling.
Minimalist Doodle Mehendi – quick sketch-style motifs (hearts, feathers, leaves).
Abstract Brush Style – bold strokes mimicking brush painting with a cone.
Layered Borders – three-layer bands with different textures.
Checkered Lotus Grids – lotus flowers inside square grid boxes.
Diamond Filler Motifs – filling designs inside diamond shapes.
Bracelet with Danglers – wrist designs hanging like charms.
Cosmic Energy Mehendi – chakra wheels, kundalini spirals.
Modern Line Art Mehendi – single continuous-line portraits or motifs.
Animal Paw Motifs – cats, dogs, parrots as playful fillers.
Festival Fireworks Style – spark bursts, circular scatter dots.
Fashion-Inspired Mehendi – motifs from saree borders, embroidery stitches.
Architectural Windows (Jali) – Mughal jharokha + arch lattice.
Puzzle Pattern Mehendi – interlocking puzzle pieces as fillers.
3D Shadow Practice – same motif shown flat vs. with shaded depth.
Stencil Style Mehendi – bold cut-out blocks like stencil art.
Henna Graffiti Letters – street-art inspired alphabets.
Fingerprint Mehendi – swirl/fingerprint pattern fillers.
Henna Geometry Mandalas – compass-style geometric circles.
Broken Pattern Mehendi – incomplete shapes left artistic.
Henna Flames & Smoke – rising flame / curling smoke motifs.
Crystal & Gem Motifs – diamond cut, prism shapes in henna.
Origami Mehendi – folded paper-look line motifs.
Galaxy Mehendi – planets, rings, comets in abstract henna.
Henna Borders with Tassels – thread + hanging tassel bands.
Origination Swirls – swirl that multiplies outward like fractals.
Henna Textile Weaves – weave/basket textures.
Shadow Silhouette Figures – dancers, animals, or leaves as dark silhouettes.
Mehendi Puzzle Maze – labyrinth line practice.
Henna Patchwork Quilt – different motifs joined in square patches.
Henna Constellations – star-connected dot patterns.
Optical Grid Mehendi – illusion grids that bend/wave.
Butterfly Wing Symmetry – mirror practice with wings.
Henna Spirals with Petal Ends – spirals turning into flowers.
Clock & Time Motifs – vintage clocks, sand timers in henna form.
Basket & Pot Designs – matka, kalash, woven baskets.
Henna Tribal Masks – inspired by folk mask art.
Feather + Dreamcatcher Mehendi – fusion of softness + detailing.
Henna Waves & Currents – ocean wave line practice.
Magic Eye Circles – concentric dot + line illusions.
Curtain Style Drapes – hanging curtain patterns in borders.
Henna Hexagon Nets – honeycomb fillers.
Animal Print Mehendi – leopard spots, zebra stripes in motifs.
Galaxy Swirls – cosmic nebula-like circular fillers.
Signature Mehendi Motif – a unique personalized “logo” students design.
Beginner’s Reusable Mehndi Practice Book | 48 Colour Printed Pages | Premium Laminated Workbook | Reusable Mehendi Design Learning Book for Artists, Students & Beginners
🟣 Product Description:
Unlock your creativity and master the art of Mehendi with this Premium Reusable Mehndi Practice Book.
Specially designed for learners and professionals, this book offers a perfect blend of practice, precision, and performance. Each page is laminated and reusable, allowing you to practice again and again using erasable markers — saving paper while improving your skills.
✨ Key Features:
📖 48 Colour Printed Pages: Premium-quality pages with attractive and clear design outlines.
♻️ Reusable & Eco-Friendly: Wipe and reuse — no need for multiple books or wasted paper.
🎨 Learn from Basic to Advance: Step-by-step patterns including Arabic, Indian & Bridal designs.
💼 Perfect for All Skill Levels: Ideal for beginners, learners, trainers, and professional artists.
🏠 Portable & Convenient: Great for home practice, beauty classes, and workshops.
🌺 Boost Creativity & Precision: Structured layouts help you refine strokes, symmetry, and flow.
Whether you’re preparing for bridal mehendi, festive occasions, or just enhancing your professional artistry, this Reusable Mehndi Practice Book is your ultimate creative partner.
🟢 Specifications:
Book Type: Reusable Mehndi Practice Workbook
Total Pages: 48 (Colour Printed)
Paper Type: Premium Quality Laminated Sheets
Suitable For: Beginners, Students, Artists, Trainers
Language: English
Reusable: Yes
Publisher/Brand: Mehndi Chaska Academy
Reusable Mehndi Practice Book
• Mehndi Design Practice Book
• Mehndi Workbook for Beginners
• Henna Practice Book
• Reusable Mehndi Book
• Mehendi Learning Book
• Mehndi Training Book
• Mehndi Design Book for Artists
• Mehendi Practice Sheets
• Mehndi Art Learning Book
• Reusable Mehndi Workbook Laminated Pages
• Arabic Mehndi Design Book
• Indian Bridal Mehndi Practice Book
• Mehndi Patterns Step by Step
• Mehndi Practice for Beginners
• Professional Mehndi Practice Book
• Henna Design Workbook
• Mehndi Design Learning Book for Students
• Mehndi Drawing Book for Practice
• Practice Mehndi Book for Artists
• Mehndi reusable laminated practice sheets
• Learn Mehndi art at home
• Best Mehndi design practice book for beginners
• Mehndi art learning book with colour pages
• Reusable Mehndi workbook for professional artists
• Mehndi practice notebook eco-friendly
• Bridal Mehndi patterns practice guide
• Reusable Mehndi book 48 pages premium quality
• Henna art reusable learning book
• Practice Mehndi designs again and again
Reusable & Eco-Friendly Design: Each laminated page can be wiped clean and reused multiple times, saving paper and protecting the environment.
48 Colour Printed Pages: Premium quality pages with clear outlines and vibrant designs for realistic practice.
Comprehensive Learning: Includes a variety of Arabic, Indian, and Bridal patterns — ideal for step-by-step learning.
Durable Premium Lamination: Long-lasting and waterproof pages ensure smudge-free practice with markers.
Perfect for All Levels: Suitable for beginners, students, and professional mehndi artists.
Portable Size: Lightweight and easy to carry for home use, beauty classes, or workshops.
Skill Enhancement: Helps improve line control, creativity, symmetry, and precision in Mehndi application.
Reusable with Marker Pens: Works best with whiteboard or sketch markers for erasable practice.
Ideal Gift Choice: A thoughtful and practical gift for anyone interested in learning Mehndi art.
Made in India: Proudly designed and printed in India using quality materials.
Beginner’s Reusable Mehndi Practice Book | 48 Colour Printed Pages | Premium Laminated Workbook | Reusable Mehendi Design Learning Book for Artists, Students & Beginners
 Product Description:
Unlock your creativity and master the art of Mehendi with this Premium Reusable Mehndi Practice Book.
Specially designed for learners and professionals, this book offers a perfect blend of practice, precision, and performance. Each page is laminated and reusable, allowing you to practice again and again using erasable markers — saving paper while improving your skills.
 Key Features:
 48 Colour Printed Pages: Premium-quality pages with attractive and clear design outlines.
 Reusable & Eco-Friendly: Wipe and reuse — no need for multiple books or wasted paper.
 Learn from Basic to Advance: Step-by-step patterns including Arabic, Indian & Bridal designs.
 Perfect for All Skill Levels: Ideal for beginners, learners, trainers, and professional artists.
 Portable & Convenient: Great for home practice, beauty classes, and workshops.
 Boost Creativity & Precision: Structured layouts help you refine strokes, symmetry, and flow.
Whether you’re preparing for bridal mehendi, festive occasions, or just enhancing your professional artistry, this Reusable Mehndi Practice Book is your ultimate creative partner.
 Specifications:
Book Type: Reusable Mehndi Practice Workbook
Total Pages: 48 (Colour Printed)
Paper Type: Premium Quality Laminated Sheets
Suitable For: Beginners, Students, Artists, Trainers
Language: English
Reusable: Yes
Publisher/Brand: Mehndi Chaska Academy
Reusable Mehndi Practice Book
• Mehndi Design Practice Book
• Mehndi Workbook for Beginners
• Henna Practice Book
• Reusable Mehndi Book
• Mehendi Learning Book
• Mehndi Training Book
• Mehndi Design Book for Artists
• Mehendi Practice Sheets
• Mehndi Art Learning Book
• Reusable Mehndi Workbook Laminated Pages
• Arabic Mehndi Design Book
• Indian Bridal Mehndi Practice Book
• Mehndi Patterns Step by Step
• Mehndi Practice for Beginners
• Professional Mehndi Practice Book
• Henna Design Workbook
• Mehndi Design Learning Book for Students
• Mehndi Drawing Book for Practice
• Practice Mehndi Book for Artists
• Mehndi reusable laminated practice sheets
• Learn Mehndi art at home
• Best Mehndi design practice book for beginners
• Mehndi art learning book with colour pages
• Reusable Mehndi workbook for professional artists
• Mehndi practice notebook eco-friendly
• Bridal Mehndi patterns practice guide
• Reusable Mehndi book 48 pages premium quality
• Henna art reusable learning book
• Practice Mehndi designs again and again
Reusable & Eco-Friendly Design: Each laminated page can be wiped clean and reused multiple times, saving paper and protecting the environment.
48 Colour Printed Pages: Premium quality pages with clear outlines and vibrant designs for realistic practice.
Comprehensive Learning: Includes a variety of Arabic, Indian, and Bridal patterns — ideal for step-by-step learning.
Durable Premium Lamination: Long-lasting and waterproof pages ensure smudge-free practice with markers.
Perfect for All Levels: Suitable for beginners, students, and professional mehndi artists.
Portable Size: Lightweight and easy to carry for home use, beauty classes, or workshops.
Skill Enhancement: Helps improve line control, creativity, symmetry, and precision in Mehndi application.
Reusable with Marker Pens: Works best with whiteboard or sketch markers for erasable practice.
Ideal Gift Choice: A thoughtful and practical gift for anyone interested in learning Mehndi art.
Made in India: Proudly designed and printed in India using quality materials.
Take a look at this Beginner’s Reusable Mehndi Practice Book | 48 Colour Printed Pages | Premium Laminated Workbook | Reusable Mehendi Design Learning Book for Artists, Students & Beginners – • Reusable Mehndi Practice Book
• Mehndi Design Practice Book
• Mehndi Workbook for Beginners
• Henna Practice Book
• Reusable Mehndi Book
• Mehendi Learning Book
• Mehndi Training Book
• Mehndi Design Book for Artists
• Mehendi Practice Sheets
• Mehndi Art Learning Book
• Reusable Mehndi Workbook Laminated Pages
• Arabic Mehndi Design Book
• Indian Bridal Mehndi Practice Book
• Mehndi Patterns Step by Step
• Mehndi Practice for Beginners
• Professional Mehndi Practice Book
• Henna Design Workbook
• Mehndi Design Learning Book for Students
• Mehndi Drawing Book for Practice
• Practice Mehndi Book for Artists
• Mehndi reusable laminated practice sheets
• Learn Mehndi art at home
• Best Mehndi design practice book for beginners
• Mehndi art learning book with colour pages
• Reusable Mehndi workbook for professional artists
• Mehndi practice notebook eco-friendly
• Bridal Mehndi patterns practice guide
• Reusable Mehndi book 48 pages premium quality
• Henna art reusable learning book
• Practice Mehndi designs
///
Mehendi Design Basic to Advance Book | 48 Pages | Black & White | Learn Arabic, Indian & Bridal Mehendi Patterns
📝 Product Description
Unlock your inner artist with this “Mehendi Design Basic to Advance Book” — a perfect guide for beginners, learners, and professional mehendi artists.
This 48-page black & white printed book contains step-by-step mehendi patterns, from simple finger designs to intricate bridal styles.
Ideal for students, salon learners, and anyone passionate about traditional henna art.
🌟 Features
📖 48 pages of unique mehendi patterns
🖤 Black & white print for easy tracing and practice
🌿 Covers Basic to Advance level designs
💫 Includes Indian, Arabic, Bridal & Indo-Arabic styles
🎨 Perfect for practice, learning, and inspiration
📚 High-quality paper suitable for daily use
🏡 Made in India
📘 Specifications
Type: Printed Design Book
Language: English / Visual Patterns
Paper Size: A4 (Approx.)
Pages: 48
Print Type: Black & White
HSN Code: 4901
GST: 0% (Exempt)
Ideal For: Mehendi Artists, Students, Beauty Parlours, Hobby Learners
#Mehendi #Mehndi #MehndiDesign #MehendiPractice #BridalMehndi #IndianMehndi #IndianMehndiArtist #StudentMehndiDesign #StylishMehendi #ArabicMehndi #IndoArabicMehndi #HennaArt #HennaArtist #MehndiWorkshop #MehndiTraining #MehndiClass #MehndiAcademy #MehndiDesignsForBeginners #BridalMehndiDesigns #LatestMehndiDesigns #FrontHandMehndi #BackHandMehndi #FullHandMehndi #MehndiLovers #HennaDesigns #MehndiTutorial #ModernMehndiDesign #SimpleMehndiDesign #IndianBride #IndianWedding #TraditionalMehndi #CreativeMehndi #ProfessionalMehndi #FestivalMehndi #KarwaChauthMehndi #DiwaliMehndi #EidMehndi #MehndiArt #MehndiForBeginners #MehndiPracticeSession #MehndiConeArt #HennaLovers #HennaPatterns #IndianHenna #MehndiArtistIndia #HennaDesignIndia #MehndiLearning #HandArt #CulturalArtIndia #MehndiMagic #MehndiVibes mehendi book, mehendi design book, mehendi practice book, mehendi learning book, mehendi drawing book, mehndi book, mehndi design book, mehndi practice book, mehndi drawing book, mehndi guide book, mehndi pattern book, henna design book, henna drawing book, reusable mehendi practice book, reusable mehndi book, laminated mehendi book, color mehendi design book, color mehndi practice book, wipe and reuse mehendi book, dry erase mehendi practice book, washable mehendi design book, reusable mehndi stencil book, reusable mehendi learning book, premium mehendi practice pad, mehendi practice reusable pages, reusable henna design book, practice mehendi for beginners reusable, mehndi practice book reusable beginners, mehndi book black and white, mehendi xerox book, mehendi design black and white, mehendi design 48 pages, mehndi design basic to advance book, mehendi simple design book, mehndi design sketch book, mehndi learning xerox book, mehndi pattern collection book, mehndi design tracing book, mehndi design copy book, mehndi training book, mehndi course book, mehndi drawing practice sheets
SYLLABUS
• Cone holding & pressure techniques
• Henna basics & fillings
• Checks and grids
• Borders
• Negative fillings & cutworks
• Basic and advance Lotus
• Flowers with different shading techniques
• Mahal startup
• Finger designs
• Mandala design
• Arabic designs
• Bridesmaid design
• Guest mehendi
• Bells and jhumkas
• Peacock, Elephant, Swan, Parrot, Horse
• Baby shower elements, Cartoon figures
• Bridal instruments
• Ganesh ji
—
• Bride and groom side face, 3/4th and front face
• Miniature figures
• Full bride, Full groom figures
• Karwachauth figure, Doli bride, Christian bride
• How to connect front and back hand design
• Bridal design
• Leg designs
• How to set prices
• How to deal with customers
• How to confirm orders
• How to save mehendi artwork
—
Note:
100% Beginner friendly course
No prior knowledge required
—
HENNA MIXOLOGY SYLLABUS
• How to choose Henna powder and oils
• Sugar usage
• Different mehendi paste making recipes
• Types of cellophane sheets
• Cone rolling, filling and sealing
• Cone storage methods
• Types of pins and their importance
• Dye release
• How to test fake oils & lot more
—
Note:
100% natural and skin-safe recipes
No chemical-based recipes ❌
Reusable Mehendi Practice Book Mehndi Design Beginners Professionals Learn Improve Like Pro
Reusable Mehndi Book – Practice Again & Again Without Wasting Paper! 💫
The Ultimate Reusable Mehndi Practice Book | Perfect for Beginners & Artists
New Concept! Reusable Mehndi Design Book for Endless Practice 🌸
Advance Reusable Mehndi Book | Learn, Practice & Improve Like a Pro
Eco-Friendly Reusable Mehndi Book – Learn Mehndi Smarter!
✨ DESCRIPTION
Informative
Introducing the Reusable Mehndi Book — designed for artists, learners, and professionals!
🎨 Practice mehndi designs again and again without wasting paper or ink.
💧 Just wipe and reuse for unlimited practice sessions.
🌺 Perfect for beginners, students, and academies.
✅ Easy to clean
✅ Realistic hand and foot outlines
✅ Ideal for bridal, Arabic, and Indian mehndi practice
🔔 Subscribe for more mehndi tips, tutorials, and creative ideas!
📍Available now at Mehndi Chaska Academy
Are you tired of wasting paper while practicing mehndi?
Say hello to the Reusable Mehndi Book – a game-changer for every mehndi lover! 🌸
Practice endlessly, improve your skills, and perfect your art – all while saving money and the environment 🌿.
💫 Suitable for:
Beginners learning designs
Artists improving precision
Academies teaching professional mehndi courses
🔔 Don’t forget to subscribe and turn on the bell icon for more creative mehndi tutorials!
Short & Catchy
The Reusable Mehndi Practice Book is here! 🌿
Practice → Erase → Reuse → Repeat ✨
Perfect for artists who want to learn, improve, and master mehndi the smart way!
💖 Follow @MehndiChaskaAcademy for more mehndi innovations.
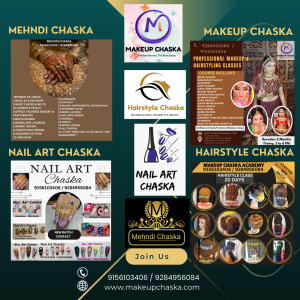
MAKEUP HAIRSTYLE NAIL ART MEHNDI CHASKA ACADEMY |
MAKEUP CHASKA ACADEMY |
Makeup Chaska Academy Professional Makeup Theory Book – Learn Makeup Brushes, Color Wheels, Skincare, Tools & Techniques
Table of Contents – Makeup Theory Book
Chapter 1: Introduction to Makeup
Basics of makeup: face, eyes, lips, and cheeks.
Understanding the purpose of makeup: enhancing features and building confidence.
Fundamentals of face preparation and overall makeup approach.
Chapter 2: Makeup Tools & Brushes
Comprehensive guide to essential makeup tools for beginners and professionals.
Overview of makeup brushes: foundation, powder, eyeshadow, blush, concealer, and eyeliner.
Understanding brush shapes, sizes, and their intended purposes.
Guide to sponges, beauty blenders, and other applicators for precise application.
Maintenance, cleaning, and hygiene practices to prolong tool lifespan and ensure safe application.
Chapter 3: Face Products & Techniques
In-depth exploration of foundational face products.
Foundation types: liquid, cream, powder, and their coverage levels.
Concealer selection and precise application for under-eye circles, blemishes, and imperfections.
Blush, highlighter, and bronzer: understanding placement, blending techniques, and creating dimensional effects.
Primer and setting products: importance, selection, and proper application for long-lasting results.
Chapter 4: Eye Makeup
Complete guide to eye enhancement techniques for all occasions.
Eyeshadow types, palettes, and color combinations for balanced, creative looks.
Eyeliner application: pencil, gel, and liquid techniques for various eye shapes.
Mascara, false lashes, and lash enhancement tips to elevate eye definition.
Eyebrow tools, shaping, grooming methods, and professional design strategies.
Chapter 5: Lip Makeup
Techniques for defining, shaping, and enhancing lips.
Lipstick types: matte, satin, and gloss finishes for different effects.
Lip liner usage, lip shaping, and precision application.
Ombré lips, gradient techniques, and creative lip artistry.
Lip care and preparation: achieving smooth, hydrated, and well-prepped lips.
Chapter 6: Color Theory & Application
Understanding the science and artistry of color in makeup.
Primary, secondary, and complementary colors: theory and practical application.
Skin tone and undertone mapping for correct product selection.
Mixing and matching colors for eyes, lips, and cheeks to achieve harmony.
Balancing bold and neutral looks for professional and creative applications.
Chapter 7: Contouring & Highlighting
Mastering light, shadow, and facial sculpting techniques.
Contour placement for various face shapes to enhance natural features.
Highlighting techniques to emphasize facial structure, radiance, and symmetry.
Blending methods to achieve seamless, natural, and professional results.
Chapter 8: Special Makeup Techniques
Advanced techniques for creative and transformational makeup looks.
Smokey eye variations and stepwise creation for multiple styles.
Day versus night makeup transformations to suit different occasions.
Natural versus glam looks with before-and-after conceptualization.
Creative accents: glitter, shimmer, and statement features for professional artistry.
Chapter 9: Creative & Fashion Makeup
Exploring artistic and avant-garde makeup applications.
Editorial makeup styles: bold, artistic, and high-fashion looks.
Face painting, festival, and performance makeup techniques.
Seasonal and themed makeup palettes for professional and event-specific use.
Experimentation with unconventional colors, patterns, and textures.
Chapter 10: Skincare Basics for Makeup
Understanding the importance of skin preparation before makeup.
Daily skincare routines: cleansing, toning, moisturizing, and priming.
Primer, serums, and setting sprays: selecting the right products for longevity and finish.
Skin type assessment and product recommendations for optimal makeup application.
Chapter 11: DIY & Practice Sheets
Hands-on practice for mastering makeup techniques.
Practice templates for face charts, product application, and feature-focused exercises.
Brush placement exercises to improve precision and skill.
Color mixing, combination, and creative practice sheets for enhanced learning.
Developing confidence and technical skills through repeated practice.
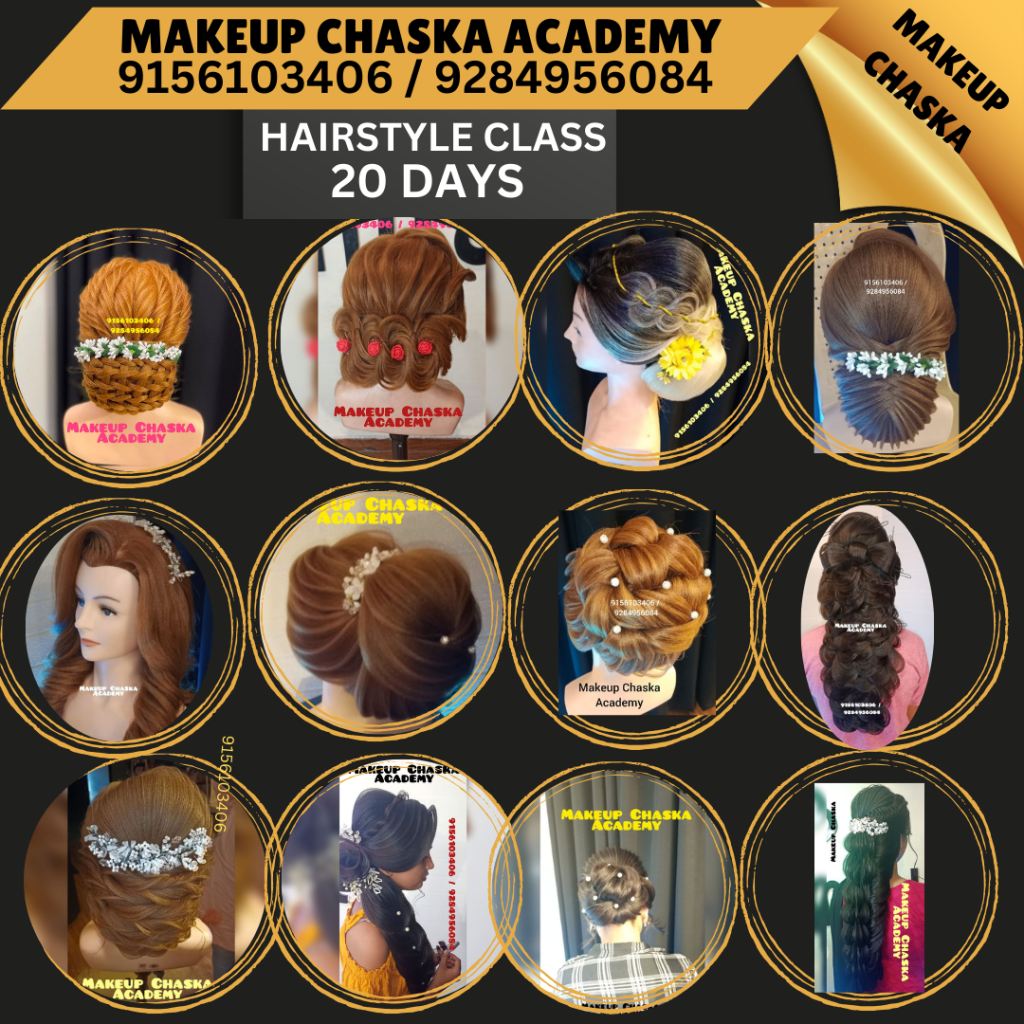
HAIRSTYLE CHASKA ACADEMY |
Table of Contents – Hairstyle Theory Book
Chapter 1: Introduction to Hairstyling
Understanding professional hairstyling as an art and technique.
Importance of hairstyling in makeup, fashion, and bridal services.
Basic terminology and hairstyling tools overview.
Chapter 2: Hair Structure & Scalp Knowledge
Hair anatomy and growth cycle.
Different hair types and textures.
Understanding scalp conditions and hair health.
Chapter 3: Hairstyling Tools & Product Knowledge
Professional hairstyling tools: dryers, irons, curlers, crimpers, and brushes.
Styling products: serums, sprays, mousses, and heat protectants.
Hygiene, safety, and maintenance of hairstyling tools.
Chapter 4: Blow Dry Techniques
Basic and advanced blow-dry methods.
Smooth, volume, inward, outward, and curly blow-dry techniques.
Face framing using blow-dry styling.
Chapter 5: Curling & Iron Techniques
Tongs curls, iron curls, and crimping methods.
Different curl patterns and directions.
Curl longevity and setting techniques.
Chapter 6: Braids & Texture Creation
Basic and advanced braiding techniques.
French braid, fishtail, waterfall, snake braid, and textured braids.
Using braids to enhance hairstyles.
Chapter 7: Buns & Updo Hairstyles
Messy bun techniques.
Low buns, bridal buns, and textured buns.
Puff buns and bun variations for different occasions.
Chapter 8: Ponytails & Open Hairstyles
Textured ponytails and structured ponytails.
Open hairstyles with waves and curls.
Hollywood waves and advanced open styles.
Chapter 9: Advanced & International Hairstyles
Unicorn ponytail, mermaid hairstyle, rose element hairstyles.
S-pattern, C-pattern, and cap hairstyles.
Fusion and international hairstyling concepts.
Chapter 10: Bridal Hairstyling
Indian bridal hairstyles.
Traditional, modern, and fusion bridal looks.
Hairstyling for different face shapes and outfits.
Chapter 11: Professional Practice & Client Handling
Consultation and hairstyle selection.
Time management and speed techniques.
Portfolio building and professional growth.
NAIL ART CHASKA ACADEMY |
Professional Nail Technology & Nail Art Theory Book**
Table of Contents – Nail Art Theory Book
Chapter 1: Introduction to Nail Technology
Understanding nail art as a professional service.
Overview of nail extensions and modern nail systems.
Chapter 2: Nail Anatomy & Health
Structure of the natural nail.
Nail growth cycle and nail conditions.
Contraindications and safety awareness.
Chapter 3: Nail Preparation & Hygiene
Sanitation and hygiene standards.
Nail plate preparation techniques.
Client safety and infection control.
Chapter 4: Nail Extension Systems
Acrylic nail system.
Gel nail system.
Polygel nail system.
Tips, forms, and overlays.
Chapter 5: Nail Application & Removal Techniques
Acrylic application and removal.
Gel application and removal.
Builder gel and French application techniques.
Chapter 6: Nail Finishing & Maintenance
Buffing, shaping, and polishing.
Tip repair and overlay maintenance.
Nail care do’s and don’ts.
Chapter 7: Introduction to Nail Art
Basic nail art tools and materials.
Understanding textures, finishes, and effects.
Chapter 8: Basic & Advanced Nail Art Techniques
Ombre, glitter, foil, marble, and chrome art.
Line art, dotting tools, freehand designs.
Cat eye, crack gel, blossom gel, spider gel.
Chapter 9: 3D & Advanced Nail Art
3D stickers, rhinestones, diamonds.
4D flowers, carving gel designs.
Encapsulation and luxury nail art techniques.
Chapter 10: Professional Nail Practice
Client consultation and nail design selection.
Aftercare guidance and professional ethics.
Portfolio and career development.
Mehndi Chaska Academy |
Professional Henna (Mehndi) Theory Book – Basic to Bridal
Table of Contents – Mehndi Theory Book
Chapter 1: Introduction to Mehndi Art
History and cultural significance of henna.
Professional mehndi artistry overview.
Chapter 2: Henna Materials & Cone Preparation
Henna powder knowledge.
Cone rolling techniques.
Henna paste mixology and consistency control.
Chapter 3: Basic Mehndi Elements
Lines, dots, spirals, scallops, and teardrops.
Pressure control and cone handling techniques.
Size, shape, and flow management.
Chapter 4: Floral & Filler Elements
Basic flowers and layered florals.
Mini flowers, roses, and filler patterns.
Leaf structures and decorative elements.
Chapter 5: Design Construction Techniques
Mandala and floral mandala concepts.
Finger designs and layout planning.
Spacing, balance, and negative space usage.
Chapter 6: Intermediate Mehndi Techniques
Reverse filling and cut work.
Emboss and 3D mehndi effects.
Vines, feathers, and patch designs.
Chapter 7: Advanced Mehndi Concepts
Speed enhancement techniques.
Bold, Gulfy, Surani, and Khaleeji styles.
Connecting elements and hanging motifs.
Chapter 8: Bridal Mehndi Designs
Indian bridal mehndi concepts.
Pakistani bridal mehndi layouts.
Floral, fusion, and traditional bridal styles.
Chapter 9: Feet & Full Bridal Layouts
Feet mehndi designs.
Hand and leg bridal compositions.
Complete bridal storytelling through mehndi.
Chapter 10: Professional Practice & Marketing
Client consultation and record maintenance.
Pricing and professional conduct.
Photography and portfolio presentation.
MAKEUP CHASKA ACADEMY |
Chapter 1: Introduction to Makeup
Understanding the Essence of Makeup
Makeup is both an art and a science, designed to enhance natural beauty, correct imperfections, and convey personal style. It is a tool for self-expression, confidence-building, and professional presentation. At Makeup Chaska Academy, we emphasize that makeup is not merely about applying products, but about understanding facial anatomy, color harmony, and the psychology of appearance.
A well-executed makeup look is balanced, proportional, and complements the individual’s unique features. The professional approach involves preparation, precision, creativity, and hygiene, which together create a polished and long-lasting result.
Components of Makeup
- The Face
The face is the primary canvas for makeup. Understanding the structure and proportion of facial features is critical. Makeup application involves:
- Foundation: Evening out skin tone and creating a flawless base.
- Concealer: Targeting discolorations, blemishes, and under-eye darkness.
- Contour and Highlight: Sculpting the face using light and shadow to enhance bone structure.
- Blush and Bronzer: Adding natural warmth and dimension, tailored to skin tone.
Professional application requires selecting the right texture and formulation for the client’s skin type—whether cream, liquid, or powder.
- Eyes
The eyes are the most expressive part of the face. Eye makeup shapes perception, adds depth, and can dramatically transform the appearance. Key elements include:
- Eyeshadow: Colors and finishes are chosen to enhance eye shape, color, and desired effect (natural, glam, or editorial).
- Eyeliner: Defines the eyes, elongates or enlarges shapes, and complements eyeshadow.
- Mascara and Lashes: Adds volume, length, and intensity to lashes.
- Eyebrows: Frame the eyes and balance facial symmetry; professional shaping and grooming are essential.
- Lips
The lips are a focal point in any look. Makeup on lips involves:
- Lipsticks: Matte, satin, or glossy textures for different occasions.
- Lip Liners: Define shape, prevent feathering, and create symmetry.
- Lip Techniques: Ombré, gradient, and layered colors enhance depth and creativity.
- Cheeks
Cheeks bring life and color to the face. Strategic application of blush, bronzer, and highlighter:
- Blush: Adds a healthy flush and balances facial proportions.
- Bronzer: Warms and sculpts the face subtly.
- Highlighter: Accentuates high points like cheekbones, nose bridge, and brow bones for a radiant finish.
The Purpose and Philosophy of Makeup
At its core, makeup serves four professional objectives:
- Enhancement: Accentuates natural features for harmony and balance.
- Correction: Camouflages imperfections and ensures even skin tone.
- Expression: Reflects personality, mood, and artistic creativity.
- Confidence: A polished makeup look empowers the individual, boosting self-esteem.
Makeup professionals must combine artistry with an understanding of human anatomy, color theory, and light behavior to achieve flawless results.
Fundamentals of Face Preparation
A flawless makeup application begins with skin preparation:
- Cleansing: Removes dirt, oil, and impurities to create a hygienic base.
- Toning: Balances skin pH and tightens pores for smoother application.
- Moisturizing: Hydrates and plumps the skin for better product adherence.
- Priming: Enhances longevity and ensures even application of foundation and other products.
Proper face preparation prevents uneven texture, reduces product absorption issues, and prolongs wear. Professionals should always assess skin type, texture, and concerns before choosing products.
Professional Approach to Makeup
- Planning: Determine the look according to occasion, skin tone, facial features, and client preferences.
- Product Layering: Apply in a strategic order—primer, foundation, concealer, eyes, cheeks, and lips—for balance and harmony.
- Blending: Seamless transitions between shades create natural-looking, professional results.
- Lighting and Review: Evaluate makeup under natural light to ensure evenness, correct shadows, and appropriate color balance.
- Hygiene and Sanitation: Always use clean brushes, sponges, and sanitized products to maintain skin health.
Conclusion
Makeup is a combination of skill, knowledge, and creativity. A professional approach begins with understanding facial structure, product selection, and preparation, and extends to precision, artistry, and client-focused application. At Makeup Chaska Academy, we emphasize that the first impression is the last impression, and mastering the fundamentals of makeup lays the foundation for every advanced technique.
Chapter 2: Makeup Tools & Brushes
Introduction to Makeup Tools
Makeup tools are the backbone of any professional application. Understanding the purpose, design, and correct usage of each tool is crucial for achieving precise, hygienic, and long-lasting results. At Makeup Chaska Academy, students learn that tools are extensions of skill, enabling accuracy, creativity, and professional polish.
Selecting the right tools depends on the type of makeup, skin texture, and desired finish. Tools range from brushes and sponges to specialized applicators, each designed to perform specific functions efficiently. Proper knowledge ensures even product application, flawless blending, and enhanced control.
1. Makeup Brushes: Types and Uses
Brushes are essential for professional makeup application. Each brush has a shape, density, and texture designed for a specific purpose. Understanding these characteristics ensures correct usage and prevents uneven or harsh application.
- Foundation Brushes
- Dense, flat or rounded brushes designed for liquid, cream, or powder foundations.
- Provides smooth, even coverage and helps achieve a natural finish.
- Professional tip: Use gentle, circular motions for blending to avoid streaks.
- Powder Brushes
- Large, fluffy brushes for setting powders, bronzers, or blush.
- Ensures lightweight, even coverage without disturbing underlying makeup.
- Professional tip: Tap off excess product to prevent over-application.
- Eyeshadow Brushes
- Available in multiple shapes: flat, angled, blending, and smudger brushes.
- Designed to pack, blend, and diffuse pigment precisely on eyelids.
- Professional tip: Always start with light strokes and layer color gradually for depth.
- Blush Brushes
- Medium-sized, slightly tapered or angled brushes for precise cheek placement.
- Helps achieve natural flush and contour effects.
- Professional tip: Sweep along the cheekbone and blend towards the hairline.
- Concealer Brushes
- Small, firm brushes designed for under-eye areas, blemishes, and detailed coverage.
- Provides precision for targeted correction.
- Professional tip: Use a patting motion rather than dragging to maintain coverage.
- Eyeliner Brushes
- Fine-tipped brushes for gel or cream eyeliners.
- Angled brushes for precise lines and winged effects.
- Professional tip: Rest your elbow on a flat surface for steady application.
2. Sponges and Beauty Blenders
Sponges and beauty blenders are versatile tools that blend cream and liquid products seamlessly.
- Blending Techniques: Dampen the sponge for smooth, airbrushed finishes.
- Applications: Foundation, concealer, cream contour, highlighter, and setting with powder.
- Professional Tip: Use the pointed tip for under-eyes and corners, flat side for larger areas like cheeks and forehead.
3. Specialized Applicators
Beyond brushes and sponges, other tools enhance precision and hygiene:
- Lip brushes: For clean, precise lipstick application and ombré effects.
- Brow brushes: Angled and spoolie brushes for shaping, filling, and grooming eyebrows.
- Fan brushes: For highlighter application or removing excess powder delicately.
- Detailing brushes: Small, fine brushes for cut crease, eyeliner, or intricate designs.
Professional makeup artists rely on these tools for accuracy, definition, and artistic creativity.
4. Maintenance and Hygiene
Maintaining tools is critical for professional application, skin health, and longevity of brushes and sponges:
- Cleaning Frequency: Brushes should be cleaned weekly; sponges daily or after each use.
- Cleaning Method: Use gentle soap, brush cleanser, or mild shampoo. Rinse thoroughly and reshape.
- Drying: Air-dry brushes horizontally or upside down to prevent water from loosening the ferrule.
- Sanitation: Disinfect tools regularly to avoid contamination and maintain professional standards.
Professional makeup artists understand that clean, well-maintained tools not only protect the client’s skin but also improve product performance and final finish.
Conclusion
Mastering makeup tools and brushes is fundamental for both beginners and professionals. Knowledge of brush types, shapes, uses, and hygiene practices ensures precise application, seamless blending, and professional results. At Makeup Chaska Academy, students are trained to handle every tool with skill and care, forming the foundation for advanced makeup techniques.
Chapter 3: Face Products & Techniques
Introduction to Face Makeup
Face makeup forms the foundation of any complete makeup look. A well-prepared and evenly balanced base enhances facial features, improves skin appearance, and ensures longevity of the overall makeup. Professional face makeup focuses on correcting, perfecting, and enhancing the skin while maintaining a natural and skin-like finish.
Understanding face products and their correct application techniques is essential for achieving flawless results suitable for everyday wear, professional assignments, and special occasions.
1. Foundation: Types and Coverage Levels
Foundation is used to create an even skin tone and smooth texture.
Types of Foundation:
- Liquid Foundation: Suitable for most skin types; offers light to full coverage with a natural finish.
- Cream Foundation: Thicker texture; ideal for dry or mature skin and high-coverage requirements.
- Powder Foundation: Lightweight and matte; best for oily skin and quick applications.
Coverage Levels:
- Light Coverage: Evens skin tone without hiding natural skin.
- Medium Coverage: Covers mild pigmentation and redness.
- Full Coverage: Conceals blemishes, acne marks, and discoloration.
Professional application focuses on matching skin tone, blending evenly, and avoiding cakey texture.
2. Concealers: Correction and Coverage
Concealers are used for targeted correction and additional coverage.
Types of Concealers:
- Liquid Concealer: Best for under-eye areas and natural coverage.
- Cream Concealer: Ideal for blemishes and pigmentation.
- Stick Concealer: Provides high coverage for spot correction.
Application Areas:
- Under-eye dark circles
- Acne and blemishes
- Pigmentation and redness
- Highlighting high points of the face
Professional technique involves light tapping motions to maintain coverage without disturbing the foundation.
3. Blush: Adding Freshness and Dimension
Blush enhances facial warmth and creates a healthy appearance.
Blush Types:
- Powder Blush
- Cream Blush
- Liquid Blush
Placement Techniques:
- Applied on the apples of the cheeks
- Blended upward toward the cheekbones
- Adjusted according to face shape
Correct blush placement adds youthfulness and balance to the face.
4. Highlighter: Enhancing Facial Features
Highlighter adds light and glow to selected areas of the face.
Application Areas:
- Top of cheekbones
- Bridge of the nose
- Cupid’s bow
- Brow bone
Professional use of highlighter focuses on subtle enhancement, avoiding excessive shine.
5. Bronzer: Creating Warmth and Depth
Bronzer is used to add warmth and mild contour to the face.
Placement Areas:
- Along cheekbones
- Forehead near hairline
- Jawline
A bronzer should blend seamlessly to avoid harsh lines and maintain a natural sun-kissed effect.
6. Primer and Setting Products
Primers and setting products are essential for makeup durability.
Primer:
- Smooths skin texture
- Minimizes pores
- Improves makeup adherence
Setting Products:
- Setting Powder: Locks cream products in place
- Setting Spray: Enhances longevity and finish
Professionals select these products based on skin type and desired finish.
7. Blending Techniques for a Flawless Base
Blending is the key to professional face makeup.
Professional Blending Tips:
- Use minimal product and build coverage gradually
- Blend in natural lighting
- Ensure seamless transitions between products
Proper blending ensures the makeup looks natural, balanced, and long-lasting.
Conclusion
Mastering face products and techniques is fundamental to professional makeup artistry. Understanding product types, placement, and blending methods allows makeup artists to create flawless, customized looks for every skin type and occasion. At Makeup Chaska Academy, students are trained to develop precision, control, and confidence in face makeup application.
Chapter 4: Eye Makeup
Introduction to Eye Makeup
Eye makeup plays a vital role in defining facial expression and enhancing overall makeup impact. The eyes are the most expressive feature of the face, and professional eye makeup focuses on shape enhancement, color harmony, balance, and precision. Mastery of eye makeup techniques allows makeup artists to create looks ranging from soft and natural to bold and dramatic.
At Makeup Chaska Academy, students are trained to understand eye anatomy, product selection, and application techniques to achieve polished, long-lasting results suitable for all occasions.
1. Eyeshadow Types and Palettes
Eyeshadows are used to add depth, dimension, and color to the eyes.
Types of Eyeshadows:
- Powder Eyeshadow: Most commonly used; easy to blend and layer.
- Cream Eyeshadow: Provides intense pigmentation and smooth finish.
- Liquid Eyeshadow: Offers long-lasting shine and bold color payoff.
Eyeshadow Palettes:
- Contain light, medium, and dark shades for complete eye looks.
- Used to create transitions, depth, and highlights.
Professional application focuses on gradual layering and seamless blending.
2. Understanding Eye Shapes and Placement
Each eye shape requires specific techniques for enhancement.
Common Eye Shapes:
- Almond
- Round
- Hooded
- Deep-set
- Monolid
Proper placement of eyeshadow and liner enhances symmetry and balance, creating a flattering eye appearance.
3. Eyeshadow Application Techniques
Professional eyeshadow application follows structured steps:
- Base Shade: Applied across the eyelid for even color.
- Transition Shade: Applied in the crease for depth.
- Outer Corner Shade: Adds dimension and definition.
- Highlight Shade: Applied on brow bone and inner corner.
Blending between shades is essential to avoid harsh lines.
4. Eyeliner Types and Application
Eyeliner defines the lash line and enhances eye shape.
Types of Eyeliners:
- Pencil: Soft and easy to use for beginners.
- Gel: Provides precision and long-lasting wear.
- Liquid: Ideal for sharp lines and winged looks.
Professional eyeliner application emphasizes steady hand control and symmetry.
5. Mascara and Lash Enhancement
Mascara enhances lash length, volume, and curl.
Mascara Types:
- Lengthening
- Volumizing
- Curling
False Lashes:
- Strip lashes for full glam looks
- Individual lashes for natural enhancement
Proper lash placement improves eye openness and intensity.
6. Eyebrow Shaping and Grooming
Eyebrows frame the eyes and define facial structure.
Eyebrow Tools:
- Brow pencils
- Brow powders
- Brow gels
- Spoolie brushes
Shaping Techniques:
- Identifying natural brow arch
- Filling sparse areas
- Grooming for clean definition
Well-groomed brows balance the entire face.
7. Blending and Finishing Techniques
Finishing touches ensure professional-quality eye makeup.
- Blending harsh edges
- Matching both eyes evenly
- Cleaning fallout under eyes
- Setting eye makeup for longevity
Professional finishing creates polished, camera-ready results.
Conclusion
Eye makeup requires a balance of technique, creativity, and precision. Understanding eyeshadow types, eye shapes, eyeliner control, lash enhancement, and eyebrow grooming allows makeup artists to create versatile and expressive looks. At Makeup Chaska Academy, students develop confidence and control through structured practice and professional guidance.
Chapter 5: Lip Makeup
Introduction to Lip Makeup
Lip makeup plays an essential role in completing the overall makeup look. Well-defined and properly colored lips enhance facial balance, add character to makeup, and can transform a look from subtle to bold. Professional lip makeup focuses on shape correction, color harmony, texture selection, and precise application.
At Makeup Chaska Academy, students are trained to understand lip structure, product types, and advanced lip techniques to create flawless and long-lasting lip looks suitable for all occasions.
1. Lip Anatomy and Preparation
Understanding lip structure is the foundation of perfect lip makeup.
- Natural lip line and cupid’s bow
- Upper and lower lip balance
- Lip symmetry and proportion
Lip Preparation:
- Gentle exfoliation to remove dryness
- Hydration using lip balm
- Removing excess balm before product application
Proper preparation ensures smooth application and enhanced color payoff.
2. Lipstick Types and Finishes
Different lipstick finishes create different effects.
Types of Lipsticks:
- Matte: Long-lasting, bold, and non-shiny
- Satin: Smooth with slight shine
- Gloss: High-shine and plumping effect
- Cream: Comfortable wear with medium shine
Choosing the right finish depends on occasion, lip condition, and desired look.
3. Lip Liner Usage and Lip Shaping
Lip liners define lips and prevent lipstick from bleeding.
Functions of Lip Liner:
- Enhances lip shape
- Corrects asymmetry
- Increases lipstick longevity
Professional Shaping Techniques:
- Overlining subtly for fuller appearance
- Following natural lip contour for definition
- Filling lips with liner for base color
Precision in lip lining creates polished and professional results.
4. Lipstick Application Techniques
Professional lipstick application ensures even coverage and clean edges.
- Applying lipstick directly or with a lip brush
- Building color in thin layers
- Blotting for longevity
- Setting with light powder if required
Clean application enhances the overall makeup finish.
5. Ombré and Gradient Lip Techniques
Creative lip techniques add dimension and modern appeal.
Ombré Lips:
- Darker shade on outer corners
- Lighter shade in the center
- Blended seamlessly for depth
Gradient Lips:
- Soft transition of colors
- Natural and youthful appearance
These techniques are popular in editorial, bridal, and fashion makeup.
6. Lip Color Selection According to Skin Tone
Choosing the correct lip color enhances overall harmony.
- Nude shades for natural looks
- Warm tones for Indian skin tones
- Bold colors for statement looks
Professional makeup artists consider undertone, outfit, and occasion when selecting lip colors.
7. Lip Care and Maintenance
Healthy lips improve makeup results.
- Regular exfoliation
- Daily hydration
- Protecting lips from dryness and pigmentation
Consistent care ensures lips remain smooth, soft, and makeup-ready.
Conclusion
Lip makeup requires a balance of technique, creativity, and precision. Understanding lip products, shaping methods, color selection, and advanced techniques allows makeup artists to create looks ranging from natural elegance to bold expression. At Makeup Chaska Academy, students are trained to master lip makeup as a key element of professional artistry.
Chapter 6: Color Theory & Application
Introduction to Color Theory in Makeup
Color theory is a fundamental principle in professional makeup artistry. Understanding how colors interact, complement, and contrast with each other allows makeup artists to create balanced, harmonious, and visually appealing looks. Proper use of color enhances facial features, complements skin tone, and elevates the overall makeup outcome.
At Makeup Chaska Academy, students are trained to apply color theory practically, ensuring confident and informed color choices for every face and occasion.
1. Understanding Basic Color Theory
Color theory is based on the relationship between colors.
Primary Colors:
- Red
- Yellow
- Blue
These colors cannot be created by mixing other colors and serve as the foundation of all color combinations.
Secondary Colors:
- Orange (Red + Yellow)
- Green (Yellow + Blue)
- Purple (Blue + Red)
Tertiary Colors:
- Created by mixing primary and secondary colors
- Used to achieve nuanced and sophisticated makeup shades
Understanding these color groups helps artists predict color outcomes and mix products effectively.
2. The Color Wheel and Its Importance
The color wheel visually represents color relationships.
Key Concepts of the Color Wheel:
- Complementary Colors: Opposite colors that enhance each other
- Analogous Colors: Adjacent colors that create harmony
- Monochromatic Colors: Variations of a single color
Professional makeup artists use the color wheel to select shades that enhance eye color, lip color, and overall facial balance.
3. Skin Tone and Undertone Identification
Correct color selection depends on understanding skin tone and undertone.
Skin Tones:
- Fair
- Medium
- Dusky
- Deep
Undertones:
- Warm: Yellow, golden, or peach undertones
- Cool: Pink, red, or bluish undertones
- Neutral: Balanced mix of warm and cool
Matching makeup colors to undertones ensures natural-looking and flattering results.
4. Color Application for Eyes
Eye makeup benefits greatly from color theory.
- Complementary shades enhance eye color
- Dark shades add depth and definition
- Light shades highlight and open the eyes
Professional application balances color intensity while maintaining harmony with skin tone and outfit.
5. Color Selection for Lips
Lip color plays a major role in defining the makeup look.
- Nude shades create soft, everyday looks
- Warm tones complement Indian skin tones
- Bold shades create statement and evening looks
Lip color should balance eye makeup and overall styling.
6. Color Placement for Blush and Face Products
Blush, bronzer, and highlighter must harmonize with skin tone.
- Warm blushes add freshness
- Cool blushes add definition
- Neutral tones suit professional and bridal makeup
Correct placement and blending prevent overpowering the face.
7. Balancing Bold and Neutral Looks
Professional makeup requires balance.
- Bold eyes with neutral lips
- Bold lips with soft eye makeup
- Neutral makeup for daytime and professional settings
Understanding balance ensures the makeup enhances rather than overwhelms facial features.
8. Mixing and Customizing Colors
Professional artists often customize shades.
- Mixing foundations for perfect skin tone match
- Blending lip colors for unique shades
- Adjusting intensity for different lighting and occasions
Custom color creation demonstrates advanced artistry and adaptability.
Conclusion
Color theory is the backbone of professional makeup artistry. Understanding color relationships, skin undertones, and balanced application allows makeup artists to create visually striking and harmonious looks. At Makeup Chaska Academy, students are trained to apply color theory confidently, transforming creativity into professional skill
Chapter 7: Contouring & Highlighting
Introduction to Contouring and Highlighting
Contouring and highlighting are advanced face-sculpting techniques used to enhance facial structure through the strategic use of light and shadow. These techniques help define features, add dimension, and create balance in facial appearance. When applied correctly, contouring and highlighting can subtly enhance natural beauty or create dramatic transformation effects.
At Makeup Chaska Academy, students learn to approach contouring with precision, ensuring results remain natural, blended, and harmonious.
1. Understanding Light and Shadow in Makeup
The foundation of contouring lies in understanding how light interacts with the face.
- Dark shades create depth and recede features
- Light shades bring features forward and add brightness
Professional contouring follows the natural bone structure rather than altering facial identity.
2. Face Shapes and Their Characteristics
Identifying face shape is essential before contour application.
Common Face Shapes:
- Oval
- Round
- Square
- Heart
- Long
Each face shape requires a customized contouring approach to enhance proportions.
3. Contour Products and Textures
Contour products are available in different formulas.
- Cream Contour: Natural finish, easy blending
- Powder Contour: Matte effect, suitable for oily skin
- Stick Contour: Precise application and buildable intensity
Choosing the correct product depends on skin type and desired finish.
4. Contour Placement Techniques
Proper placement enhances facial definition.
Key Contour Areas:
- Cheek hollows
- Jawline
- Sides of the nose
- Forehead near hairline
Placement should follow natural facial shadows for realistic results.
5. Highlighting Techniques
Highlighting adds radiance and dimension.
Highlight Placement Areas:
- Top of cheekbones
- Brow bone
- Bridge of the nose
- Cupid’s bow
Highlighting should be subtle and well-blended to avoid excessive shine.
6. Blending for a Seamless Finish
Blending is critical for professional contouring.
- Use soft brushes or damp sponges
- Blend upward and outward
- Avoid harsh or visible lines
A seamless blend ensures the contour appears natural and skin-like.
7. Natural vs Dramatic Contouring
Different occasions require different intensity levels.
- Natural Contouring: Soft definition for daily wear
- Dramatic Contouring: Sharper lines for photography, stage, or bridal makeup
Professionals adjust contour strength based on lighting and setting.
8. Common Contouring Mistakes and Corrections
Avoiding common errors improves results.
- Over-contouring
- Incorrect placement
- Insufficient blending
Understanding correction techniques helps maintain professional quality.
Conclusion
Contouring and highlighting are essential techniques for adding dimension and structure to the face. Mastery of light, shadow, placement, and blending enables makeup artists to sculpt features with elegance and precision. At Makeup Chaska Academy, students develop these skills through structured learning and hands-on practice.
Chapter 8: Special Makeup Techniques
Introduction to Special Makeup Techniques
Special makeup techniques allow makeup artists to move beyond basic application and explore advanced styles, transformations, and creative expressions. These techniques are used for events, photography, fashion shows, bridal makeup, and professional assignments where enhanced impact is required.
At Makeup Chaska Academy, students are trained to understand concept development, technique execution, and visual balance while creating special makeup looks.
1. Smokey Eye Makeup Techniques
Smokey eyes are one of the most popular advanced eye makeup styles.
Key Elements of Smokey Eyes:
- Soft blending of dark and medium shades
- Gradual transition from lash line to crease
- Balanced intensity without harsh lines
Variations:
- Classic black smokey eye
- Brown smokey eye for softer looks
- Colored smokey eye for creative styles
Professional smokey eye makeup enhances eye shape while maintaining elegance.
2. Day Makeup vs Night Makeup
Makeup intensity varies according to time and occasion.
Day Makeup:
- Light coverage foundation
- Neutral eyeshadow shades
- Soft blush and lip colors
Night Makeup:
- Enhanced eye definition
- Bold eyes or lips
- Stronger contour and highlight
Understanding this contrast helps artists design suitable looks.
3. Natural Makeup vs Glam Makeup
Makeup style depends on desired appearance.
Natural Makeup:
- Skin-like finish
- Minimal contouring
- Soft eye and lip colors
Glam Makeup:
- High-definition finish
- Bold eyes or lips
- Dramatic lashes and highlights
Professionals choose the style based on client preference and event type.
4. Before-and-After Transformations
Transformation makeup demonstrates skill progression.
- Enhancing natural features
- Correcting asymmetry
- Achieving balanced proportions
Before-and-after results highlight the effectiveness of professional techniques.
5. Creative Accents and Enhancements
Creative elements add uniqueness to makeup looks.
- Glitter and shimmer usage
- Metallic pigments
- Graphic eyeliner styles
These accents should complement the look without overpowering it.
6. Makeup for Photography and Events
Special makeup techniques vary for camera and lighting.
- Matte finishes reduce shine in photography
- Enhanced contour improves facial definition
- Long-lasting products ensure durability
Professionals adapt techniques according to environment.
Conclusion
Special makeup techniques allow artists to express creativity while maintaining technical excellence. Understanding style variations, transformations, and enhancement techniques helps makeup artists deliver impactful and professional results. At Makeup Chaska Academy, students refine these skills through guided practice and artistic exploration.
Chapter 9: Creative & Fashion Makeup
Introduction to Creative and Fashion Makeup
Creative and fashion makeup is an advanced form of makeup artistry that focuses on artistic expression, innovation, and visual impact. This style is commonly used in fashion shows, editorial shoots, stage performances, festivals, and themed events.
At Makeup Chaska Academy, students are encouraged to explore creativity while maintaining technical precision, balance, and professional discipline.
1. Editorial Makeup Styles
Editorial makeup is designed for magazines, photoshoots, and runway presentations.
Key Characteristics:
- Bold color choices
- Sharp lines or artistic placements
- High-impact visual appeal
Editorial makeup emphasizes concept-driven design rather than everyday wear.
2. Avant-Garde Makeup Techniques
Avant-garde makeup pushes creative boundaries.
- Experimental textures and shapes
- Abstract designs
- Artistic use of colors and materials
This style allows makeup artists to showcase originality and innovation.
3. Fashion Show Makeup
Fashion makeup complements clothing and themes.
- Harmonizing makeup with outfits
- Consistent looks for multiple models
- Quick yet precise execution
Professional coordination with designers is essential.
4. Face Painting and Festival Makeup
Face painting and festival makeup are vibrant and expressive.
- Use of bright pigments and patterns
- Theme-based designs
- Cultural and seasonal inspirations
Artists must maintain skin safety and product compatibility.
5. Seasonal and Themed Makeup Looks
Seasonal makeup adapts to festivals, weather, and trends.
- Summer: fresh, glowing finishes
- Winter: rich tones and matte textures
- Festive: bold colors and shimmer
Understanding season-based palettes enhances professional versatility.
6. Color Play and Artistic Freedom
Creative makeup allows unrestricted use of colors.
- Mixing unconventional shades
- Layering textures
- Creating visual stories through makeup
Artists should balance creativity with facial harmony.
7. Patterns, Lines, and Graphic Elements
Graphic makeup introduces structure and design.
- Symmetry and asymmetry
- Clean lines and shapes
- Controlled use of contrast
This technique is popular in editorial and fashion makeup.
8. Makeup for Camera and Stage
Creative makeup must adapt to lighting and distance.
- Strong pigment visibility
- Matte base to reduce shine
- Enhanced contours for facial definition
Understanding camera requirements ensures professional results.
Conclusion
Creative and fashion makeup allows artists to transform makeup into visual art. By mastering editorial styles, avant-garde techniques, and themed looks, students develop confidence and artistic identity. Makeup Chaska Academy focuses on nurturing creativity while maintaining industry standards and professionalism.
Chapter 10: Skincare Basics for Makeup
Introduction to Skincare in Makeup Artistry
Skincare is the foundation of flawless makeup. No makeup application can achieve professional results without healthy, well-prepared skin. Understanding skincare principles allows makeup artists to enhance skin texture, improve product performance, and ensure long-lasting results.
At Makeup Chaska Academy, skincare education is considered an essential part of makeup training.
1. Importance of a Clean and Prepped Skin Canvas
Clean skin ensures proper makeup adherence and smooth application.
- Prevents patchiness and uneven texture
- Reduces clogged pores and irritation
- Enhances makeup longevity
A well-prepared skin canvas creates a professional finish.
2. Understanding Skin Types
Different skin types require different skincare and makeup approaches.
- Normal Skin: Balanced moisture and texture
- Dry Skin: Requires hydration and nourishment
- Oily Skin: Needs oil control and matte products
- Combination Skin: Requires targeted care
- Sensitive Skin: Needs gentle and soothing products
Identifying skin type helps select suitable skincare products.
3. Daily Skincare Routine
A consistent routine improves skin health.
Cleansing:
Removes dirt, oil, and impurities.
Toning:
Balances skin pH and prepares skin for hydration.
Moisturizing:
Maintains hydration and smoothness.
This routine should be followed regularly for optimal results.
4. Role of Serums and Treatments
Serums address specific skin concerns.
- Hydration serums
- Brightening treatments
- Texture-improving formulas
Correct serum usage improves makeup appearance.
5. Importance of Primer in Makeup
Primer creates a smooth base for makeup.
- Minimizes pores and fine lines
- Improves product grip
- Extends makeup wear time
Different primers suit different skin types.
6. Setting Products and Makeup Longevity
Setting products lock makeup in place.
- Setting sprays
- Setting powders
They prevent creasing, fading, and excessive shine.
7. Skincare Mistakes to Avoid
Common errors include:
- Skipping moisturizer
- Using harsh products before makeup
- Ignoring skin type
Avoiding mistakes ensures healthy skin and better makeup results.
Conclusion
Skincare and makeup work together to create flawless results. A strong understanding of skincare principles allows makeup artists to enhance natural beauty while maintaining skin health. At Makeup Chaska Academy, students are trained to treat skincare as the essential base of professional makeup artistry.
Chapter 11: DIY & Practice Sheets
Introduction to Practice-Based Learning
Makeup artistry is a skill-based profession that requires continuous practice and hands-on learning. Theory provides knowledge, but practical exercises help students develop precision, confidence, and creativity. DIY and practice sheets are designed to strengthen understanding through repetition and visual learning.
At Makeup Chaska Academy, practice-based training is an essential part of professional development.
1. Face Chart Practice Templates
Face charts are blank facial illustrations used to practice makeup placement and color combinations.
- Helps understand facial structure
- Allows experimentation without product wastage
- Builds confidence in design planning
Students can practice different makeup looks repeatedly using face charts.
2. Brush Placement Exercises
Brush placement practice improves tool control and technique.
- Understanding which brush is used for which product
- Learning correct application areas
- Developing smooth blending skills
These exercises improve accuracy and professional handling of tools.
3. Product Application Mapping
Mapping exercises help students visualize makeup placement.
- Foundation and concealer zones
- Blush, bronzer, and highlighter areas
- Eye and lip product positioning
Mapping creates a clear understanding of balance and symmetry.
4. Color Mixing and Combination Practice
Color practice sheets help students master color theory.
- Mixing warm and cool tones
- Creating custom shades
- Understanding color harmony
This practice improves confidence in selecting and blending colors.
5. Look Creation Exercises
Students can practice designing complete makeup looks.
- Natural makeup
- Glam makeup
- Creative or fashion makeup
These exercises encourage planning and execution skills.
6. Skill Development Through Repetition
Repeated practice builds muscle memory and consistency.
- Improves blending techniques
- Enhances speed and efficiency
- Builds professional confidence
Regular practice is key to mastery.
7. Self-Evaluation and Improvement
Practice sheets help students review their progress.
- Identifying strengths and weaknesses
- Improving technique accuracy
- Developing personal style
Self-evaluation promotes continuous learning.
Conclusion
DIY and practice sheets transform theoretical knowledge into professional skill. Through structured practice, students gain confidence, creativity, and technical precision. Makeup Chaska Academy encourages consistent practice as the foundation of successful makeup artistry.
Makeup Application Steps – Theory
Introduction
Makeup application is a systematic process that enhances facial features while maintaining balance, harmony, and skin health. Following correct application steps ensures a smooth finish, long-lasting wear, and professional results. This step-by-step theory provides a structured approach suitable for beginners and professional makeup students.
Step 1: Skin Preparation
Skin preparation is the foundation of makeup application.
- Cleanse the skin to remove dirt, oil, and impurities
- Apply toner to balance skin pH
- Moisturize according to skin type
- Allow skincare products to absorb fully
Well-prepared skin improves makeup adherence and finish.
Step 2: Primer Application
Primer creates a smooth base for makeup.
- Minimizes pores and fine lines
- Controls oil or adds hydration
- Enhances makeup longevity
Choose primer based on skin type and makeup requirement.
Step 3: Foundation Application
Foundation evens out skin tone.
- Select shade matching neck and undertone
- Apply using brush, sponge, or fingers
- Blend evenly from center of face outward
Proper blending ensures a natural appearance.
Step 4: Concealer Application
Concealer corrects imperfections.
- Under eyes: brighten and neutralize darkness
- Blemishes and spots: targeted application
- Blend seamlessly into foundation
Avoid excessive product to prevent creasing.
Step 5: Setting the Base
Setting products lock the base makeup.
- Use loose or compact powder
- Focus on oily areas
- Light application for natural finish
This step increases durability.
Step 6: Eyebrow Definition
Eyebrows frame the face.
- Shape according to natural brow line
- Fill sparse areas using pencil, powder, or gel
- Blend for soft definition
Balanced brows enhance facial symmetry.
Step 7: Eye Makeup Application
Eye makeup enhances expression.
- Apply eyeshadow in layers
- Blend crease and lid shades smoothly
- Define eyes with eyeliner
- Apply mascara or false lashes
Eye makeup intensity depends on occasion.
Step 8: Face Sculpting
Face sculpting adds dimension.
- Contour to define structure
- Apply blush for healthy flush
- Highlight high points for glow
Blend thoroughly for seamless results.
Step 9: Lip Makeup Application
Lips complete the look.
- Prepare lips with balm
- Outline using lip liner
- Apply lipstick evenly
- Blot or layer as needed
Lip color should complement the overall makeup.
Step 10: Setting and Finishing
Final setting ensures longevity.
- Use setting spray to lock makeup
- Check for balance and symmetry
- Make final touch-ups
This step completes the professional finish.
Conclusion
Following a structured makeup application process ensures consistency, precision, and professional outcomes. Understanding each step allows makeup artists to adapt techniques based on skin type, face shape, and occasion. At Makeup Chaska Academy, students are trained to master these steps through theory and practice.
Types of Foundation – Makeup Theory
Introduction
Foundation is a base makeup product used to even out skin tone, correct imperfections, and create a smooth canvas for further makeup application. Choosing the correct type of foundation is essential for achieving a natural, flawless, and long-lasting finish. Foundations vary in texture, coverage, and finish to suit different skin types and occasions.
1. Liquid Foundation
Liquid foundation is one of the most commonly used foundation types.
Characteristics:
- Lightweight to medium texture
- Easy to blend
- Buildable coverage
Finish Options:
Matte, dewy, satin, natural
Suitable for:
Normal, dry, combination, and oily skin (depending on formula)
2. Cream Foundation
Cream foundations have a rich and moisturizing texture.
Characteristics:
- Thick and creamy consistency
- High coverage
- Smooth, skin-like finish
Suitable for:
Dry skin, mature skin, bridal and professional makeup
3. Stick Foundation
Stick foundation comes in a solid stick form.
Characteristics:
- Easy to apply and control
- Medium to full coverage
- Convenient for touch-ups
Suitable for:
Normal to dry skin, on-the-go application, professional use
4. Powder Foundation
Powder foundation is available in loose or compact form.
Characteristics:
- Lightweight
- Matte finish
- Quick application
Suitable for:
Oily skin, combination skin, everyday makeup
5. Mousse Foundation
Mousse foundation has a whipped, airy texture.
Characteristics:
- Lightweight feel
- Smooth, matte finish
- Blends easily
Suitable for:
Normal to oily skin, lightweight makeup looks
6. Serum Foundation
Serum foundations combine skincare and makeup.
Characteristics:
- Very lightweight
- Natural, radiant finish
- Hydrating and nourishing
Suitable for:
Dry skin, sensitive skin, natural makeup looks
7. Water-Based Foundation
Water-based foundations feel fresh and breathable.
Characteristics:
- Lightweight consistency
- Natural finish
- Comfortable wear
Suitable for:
Sensitive skin, acne-prone skin, everyday use
8. Oil-Based Foundation
Oil-based foundations provide intense moisture.
Characteristics:
- Rich and nourishing
- Dewy finish
- Long-lasting hydration
Suitable for:
Very dry skin, mature skin
9. HD (High Definition) Foundation
HD foundations are designed for camera and lighting.
Characteristics:
- Smooth, flawless finish
- Minimizes appearance of pores and lines
- Looks natural under high-resolution cameras
Suitable for:
Photography, videography, stage and bridal makeup
10. Cushion Foundation
Cushion foundation is soaked in a sponge compact.
Characteristics:
- Lightweight
- Buildable coverage
- Dewy finish
Suitable for:
Normal to dry skin, quick application, touch-ups
Conclusion
Understanding different types of foundation allows makeup artists to select the right product based on skin type, coverage requirement, and occasion. Professional makeup results depend on choosing the correct foundation texture, finish, and formula.
Types of Primer – Makeup Theory
Introduction
Primer is a preparatory makeup product applied after skincare and before foundation. It creates a smooth surface, improves makeup adherence, and enhances longevity. Different primers are designed to address specific skin concerns and makeup needs. Understanding primer types helps makeup artists choose the correct base for flawless results.
1. Hydrating Primer
Hydrating primers are designed for dry and dehydrated skin.
Characteristics:
- Adds moisture and softness
- Prevents foundation from appearing patchy
- Creates a fresh, glowing base
Suitable for:
Dry skin, dull skin, mature skin
2. Mattifying Primer
Mattifying primers control excess oil and shine.
Characteristics:
- Absorbs oil
- Reduces shine in the T-zone
- Creates a matte finish
Suitable for:
Oily skin, combination skin, humid climates
3. Pore-Minimizing Primer
These primers help reduce the appearance of large pores.
Characteristics:
- Smooths uneven texture
- Blurs pores and fine lines
- Creates an even base
Suitable for:
Large pores, uneven skin texture
4. Illuminating Primer
Illuminating primers enhance natural radiance.
Characteristics:
- Reflects light
- Adds subtle glow
- Enhances skin brightness
Suitable for:
Normal to dry skin, dull skin, bridal or party makeup
5. Color-Correcting Primer
Color-correcting primers neutralize skin discoloration.
Common Variants:
- Green: Redness
- Peach/Orange: Dark circles, pigmentation
- Lavender: Dull or yellow tones
Suitable for:
Uneven skin tone, redness, pigmentation
6. Silicone-Based Primer
Silicone primers create a smooth, velvety finish.
Characteristics:
- Fills fine lines and pores
- Helps foundation glide smoothly
- Long-lasting effect
Suitable for:
Event makeup, photography, textured skin
7. Water-Based Primer
Water-based primers feel lightweight and breathable.
Characteristics:
- Hydrating and fresh
- Natural finish
- Comfortable wear
Suitable for:
Sensitive skin, everyday makeup
8. Grip / Long-Wear Primer
Grip primers improve foundation hold.
Characteristics:
- Sticky or tacky texture
- Locks makeup in place
- Extends wear time
Suitable for:
Long events, stage makeup, professional assignments
9. Eye Primer
Eye primers are designed for eyelids.
Characteristics:
- Prevents creasing
- Enhances eyeshadow color
- Improves longevity
Suitable for:
All eye makeup styles
10. Lip Primer
Lip primers prepare lips for lipstick.
Characteristics:
- Smooths lip texture
- Prevents feathering
- Enhances lipstick wear
Suitable for:
Matte lipsticks, long-wear lip looks
Conclusion
Choosing the correct primer is essential for achieving professional makeup results. Each primer type addresses specific skin needs and makeup goals. Understanding primer selection allows makeup artists to customize their approach for every client and occasion.
Professional Makeup Hairstyling Nail Art
1. Basics of Hairstyling
Hairstyling is the art of shaping and styling hair to enhance facial features and overall appearance. A strong understanding of hair texture, length, volume, and face shape is essential before performing any hairstyle.
Face Framing in Hairstyling
Face framing involves styling sections of hair around the face to soften features and highlight bone structure. It helps balance facial proportions and adds elegance to hairstyles.
2. Hair Texture & Styling Tools
Crimping
Crimping creates a zig-zag texture in hair to add volume and grip. It is commonly used as a base for buns and updos.
Hair Straightening
Straightening smoothens hair by removing curls or waves, giving a sleek and polished finish.
Straightening Curls
This technique involves curling the hair first and then gently straightening it to achieve soft, relaxed waves.
3. Curling Techniques
Rod Curls
Rod curls are created using curling rods to form uniform curls. Curl size depends on rod thickness.
Blow Dry
Blow drying shapes hair using heat and airflow. It can create volume, smoothness, or waves depending on brush technique.
4. Braiding Techniques
French Braid
A classic braid where hair is added gradually while braiding from the crown.
Fishtail Braid
A detailed braid created by crossing small sections from each side.
Waterfall Braid
A flowing braid where sections are dropped to create a cascading effect.
Snake Braid
A decorative braid where hair is pushed upward to form a snake-like pattern.
5. Bun & Updo Hairstyles
Messy Bun
A relaxed, textured bun for casual or modern looks.
Puff Bun
A bun combined with volume at the crown for a lifted appearance.
Bun with Braids
Braids are incorporated into buns for decorative detailing.
Princess Look Hairstyle
Elegant hairstyle featuring volume, curls, and structured sections.
6. Nail Art Theory
Introduction to Nail Art
Nail art enhances hands using colors, designs, textures, and embellishments.
Types of Nail Art
- Basic nail paint application
- Minimal designs
- Creative patterns
- Embellished nail art
7. Makeup Hygiene & Tools Knowledge
Brush Knowledge
Understanding brush shapes and uses ensures correct application.
- Foundation brush
- Blending brush
- Eyeshadow brush
- Angled brush
Hygiene in Makeup
Maintaining hygiene prevents skin infections and product contamination.
- Clean brushes regularly
- Sanitize tools
- Avoid double dipping
8. Skin Analysis
Skin Types
- Normal
- Dry
- Oily
- Combination
- Sensitive
Skin Conditions
- Acne
- Pigmentation
- Dehydration
- Aging
Understanding skin type and condition helps choose correct products.
9. Primer & Color Correction
Primer
Primer prepares skin for makeup, smoothens texture, and increases longevity.
Color Correction
Color correctors neutralize discoloration using color theory.
- Green: redness
- Peach/Orange: dark circles
- Lavender: dullness
Correct brush usage ensures precise application.
10. Foundation & Concealer Theory
Choosing the Correct Foundation
Foundation should match skin tone, undertone, and skin type.
Undertones
- Warm
- Cool
- Neutral
Concealer Usage
Concealer corrects dark circles, blemishes, and uneven tone.
Application & Blending
Proper tools and blending techniques create seamless finish.
11. Color Theory in Makeup
Color theory helps balance makeup colors.
- Primary colors
- Secondary colors
- Complementary colors
It guides eye, lip, and blush combinations.
12. Face & Feature Analysis
Face Shapes
- Oval
- Round
- Square
- Heart
- Diamond
Lip Shapes
Understanding lip shapes helps in defining and enhancing lips.
Eye Shapes
- Almond
- Round
- Hooded
- Monolid
- Downturned
13. Blush Application Techniques
Different blush placements create different effects:
- For lifting face
- For slimming cheeks
- For youthful appearance
14. Eye Enhancement Techniques
Making Small Eyes Look Bigger
- Light shades on lid
- Defined crease
- Proper eyeliner placement
15. Eye Makeup Styles
Single Cut Crease
Defined crease with single contrast shade.
Half Cut Crease
Half lid defined for softer effect.
Double Cut Crease
Two crease lines for dramatic effect.
Halo Eye Makeup
Dark outer and inner corners with light center.
Smokey Eye Makeup
Blended dark shades for intense eyes.
Monochromatic Eye Makeup
Single color family used across eyes.
Glitter Eye Makeup
Glitter used to enhance eye makeup.
16. Advanced Makeup Theory
3D Makeup Theory
Makeup using light and shadow to create depth and dimension.
17. Makeup Look Creation
Nude Look Makeup
Natural makeup enhancing skin and features.
Red Carpet Makeup
Bold yet elegant makeup with sharp liner and matte finish.
Muslim Bride Makeup
Soft dewy skin with Arabic eye style.
Indian Traditional Bridal Makeup
HD finish with vintage liner and traditional elements.
Brazilian Eye Makeup
Bold eye definition with clean blending.
Conclusion
Professional makeup and hairstyling require a balance of theory, technique, and creativity. Understanding tools, skin, face structure, color theory, and styling methods allows makeup artists to deliver flawless results across various looks and occasions.
HAIRSTYLE CHASKA ACADEMY |
Professional Hairstyling Theory
Introduction to Hairstyling
Hairstyling is an essential part of professional makeup artistry. A well-executed hairstyle enhances facial features, complements makeup, and completes the overall look. Hairstyling requires knowledge of hair texture, structure, tools, techniques, and creative elements.
Professional hairstyling combines technical skill, artistic vision, and precision.
Product & Tool Knowledge in Hairstyling
Hairstyling Tools
- Hair dryer
- Curling tongs
- Flat iron
- Crimping iron
- Round brushes
- Teasing comb
- Sectioning clips
- Hair padding and donuts
Each tool serves a specific purpose and must be selected based on hairstyle requirements.
Hairstyling Products
- Heat protectant
- Hair mousse
- Hair serum
- Texturizing spray
- Hair spray
- Gel and wax
Correct product usage ensures hold, shine, and longevity.
Hair Texture & Preparation
Hair preparation is the foundation of styling.
- Clean and dry hair
- Proper blow dry direction
- Texture creation for grip
- Volume preparation at the crown
Prepared hair allows styles to hold better and appear polished.
Blow Dry Techniques with Curls
Blow drying is used to shape and prepare hair.
Types of Blow Dry
- Straight blow dry
- Voluminous blow dry
- Blow dry with soft curls
- Blow dry with bounce
Curls can be added during or after blow drying using round brushes or tongs.
Tong Curls & Iron Curls with Face Framing
Curling techniques add movement and elegance.
Tong Curls
- Soft curls
- Tight curls
- Loose waves
Iron Curls
- Smooth structured curls
- Defined curl patterns
Face Framing
Face-framing curls soften facial features and enhance jawline and cheekbones.
Messy Bun Hairstyle
The messy bun is a modern, textured hairstyle.
Characteristics
- Loose structure
- Natural texture
- Soft volume
It is suitable for casual, party, and pre-bridal looks.
Bridal Bun Hairstyle
Bridal buns are elegant and long-lasting.
Key Features
- Strong base
- Clean structure
- Balanced volume
- Secure pinning
Bridal buns must complement bridal attire and jewelry.
Open Hairstyle with Braid
This style combines flow and structure.
- Braids add detailing
- Open hair adds softness
- Suitable for engagement and reception looks
Textured Ponytail
A textured ponytail adds volume and dimension.
- Crown volume
- Wrapped hair elastic
- Soft waves or straight texture
Suitable for modern and fashion looks.
Low Bun with Lines (Advanced Hairstyling)
This style involves clean sections and defined lines.
- Sharp partings
- Structured placement
- Sleek finish
Often used in editorial and bridal looks.
Hollywood Waves
Hollywood waves are classic and glamorous.
Characteristics
- Deep S-shaped waves
- Smooth and shiny finish
- One-directional flow
Requires precision and proper setting.
Bun with Crisscross Waves
This style features crossed wave patterns.
- Adds depth and texture
- Artistic appearance
- Suitable for advanced bridal looks
Unicorn Ponytail
A creative and trendy ponytail style.
- High volume
- Wrapped sections
- Fantasy-inspired finish
Popular in fashion and editorial hairstyling.
Mermaid Hairstyle with Advanced Elements
Mermaid hairstyles are soft and flowing.
- Loose waves
- Braids or twists
- Accessories
Advanced elements enhance creativity.
Advanced Bridal Bun
An advanced bridal bun involves multiple techniques.
- Layered structure
- Braids, twists, or waves
- Long-lasting hold
Designed for heavy bridal wear.
Open Hairstyle Using Pulling Techniques
Pulling techniques create volume and softness.
- Gentle section pulling
- Natural texture
- Soft silhouette
Used in reception and party looks.
Rose Element Hairstyle
Rose hairstyles use hair to create floral shapes.
- Artistic design
- Detailed sectioning
- Decorative finish
Popular in bridal and creative hairstyling.
International Hairstyling Patterns
S-Pattern Hairstyle
- Smooth flowing curves
- Elegant and soft look
C-Pattern Hairstyle
- Rounded curve structure
- Adds volume and balance
Cap Hairstyling
- Hair arranged to cover the head shape evenly
- Used for structured updos
Step-by-Step Training Philosophy
Professional hairstyling follows a step-by-step approach:
- Hair analysis
- Product selection
- Tool selection
- Sectioning
- Styling execution
- Finishing and setting
This ensures consistency and perfection.
Floral Makeup Art (Introduction)
Floral makeup art uses flowers or floral patterns to enhance makeup and hairstyle harmony. It is often combined with bridal or creative looks.
Hairstyling Hygiene & Safety
- Clean tools after use
- Avoid overheating tools
- Use heat protectants
- Secure hairstyles properly
Safety ensures hair health and client comfort.
Conclusion
Hairstyling is a blend of technique, creativity, and structure. Understanding hair preparation, styling patterns, advanced elements, and international trends allows hairstylists to create versatile and professional looks. Mastery comes from theory, practice, and artistic vision.
NAIL ART CHASKA ACADEMY |
Professional Nail Technology & Nail Art Theory
Introduction to Nail Extension & Nail Technology
Nail extension technology is the professional process of enhancing the natural nail by increasing its length, strength, and appearance using artificial materials such as acrylic, gel, polygel, or builder systems. Nail technology combines science, hygiene, structure, and artistry to create durable and aesthetic nail enhancements.
Professional nail services require understanding of nail anatomy, product chemistry, application techniques, and client safety.
Nail Anatomy
Understanding nail anatomy is essential for safe nail services.
Parts of the Natural Nail
- Nail Plate – Visible hard part of the nail
- Nail Bed – Skin beneath the nail plate
- Cuticle – Protective layer of dead skin
- Eponychium – Living skin at nail base
- Matrix – Growth area of the nail
- Hyponychium – Skin under free edge
Healthy nail anatomy ensures correct application and prevents damage.
Contraindications in Nail Services
Contraindications are conditions where nail services should be avoided or postponed.
Common Contraindications
- Fungal infections
- Bacterial infections
- Severe nail damage
- Open wounds or cuts
- Nail diseases
Client safety is always the first priority.
Nail Plate Preparation
Nail preparation ensures strong adhesion and longevity.
Steps of Nail Plate Preparation
- Sanitization
- Cuticle care
- Gentle buffing
- Removing shine
- Dehydration and primer application
Proper preparation prevents lifting and breakage.
Fixing Nail Tips
Nail tips are artificial extensions used to add length.
Types of Nail Tips
- Clear tips
- Natural tips
- White tips
- Pre-shaped tips
Correct sizing and alignment are crucial for balance and strength.
Acrylic Application & Removal
Acrylic is a strong nail enhancement system.
Acrylic Application
- Mixing liquid monomer and powder polymer
- Bead placement
- Sculpting nail shape
- Curing in air
Acrylic Removal
- Filing bulk
- Soaking in remover
- Gentle push-off
Buff & Polish
Buffing smooths the nail surface while polishing enhances shine.
Benefits
- Smooth finish
- Natural glow
- Improved product adhesion
Overlays
Overlays strengthen the natural nail without adding length.
Types of Overlays
- Acrylic overlay
- Gel overlay
- Polygel overlay
Gel System
Gel nails use UV/LED curing technology.
Gel Set Features
- Flexible finish
- High shine
- Lightweight feel
Gel Overlays
Gel overlays protect natural nails and improve durability.
Tip Repair
Tip repair fixes broken or damaged extensions using acrylic or gel to restore structure.
Gel Removal
Gel is removed by filing or soaking, depending on product type, without damaging the natural nail.
Builder French Application (Acrylic & Gel)
Builder French creates structured French tips using builder products.
- White tip construction
- Natural pink base
- Perfect smile line
Builder White Natural Nail Overlay
Used to create a clean, natural white nail look with strength and structure.
Steps of Gel Application
- Nail preparation
- Base coat curing
- Builder or color gel application
- Layer curing
- Top coat sealing
Nail Diseases & Disorders
Understanding nail disorders helps avoid complications.
Common Nail Disorders
- Onycholysis
- Onychomycosis
- Brittle nails
- Nail ridges
- Discoloration
Nail Care Do’s & Don’ts
Do’s
- Maintain hygiene
- Moisturize cuticles
- Use gloves for chores
Don’ts
- Avoid biting nails
- Do not over-file
- Avoid harsh chemicals
ADVANCED NAIL ART THEORY
Ombre Nails
Gradient blending of two or more colors for a seamless transition.
Mylar Nail Art
Uses reflective sheets for holographic effects.
Falling Glitter
Glitter concentrated at cuticle fading towards tip.
Strips Art
Metallic or tape strips used for geometric designs.
3D Stickers
Pre-made raised designs for quick decoration.
Marble Nail Art
Water or brush technique creating stone-like patterns.
Foil Art
Transfer foils applied for metallic textures.
4D Flowers
Highly raised floral designs using sculpting gels.
Free Hand Nail Art
Hand-drawn designs using brushes.
Dotting Tool Art
Uses dotting tools to create patterns and florals.
Diamond / Rhinestones
Crystal embellishments for luxury nail designs.
Flower Encapsulation
Flowers sealed inside clear gel or acrylic.
Line Art
Fine lines creating minimalist designs.
Chrome Art
Mirror-like metallic finish using chrome powders.
Cat Eye Nails
Magnetic gel creates light-reflective patterns.
Water Decals
Pre-printed designs transferred with water.
Crack Gel
Creates cracked effect upon drying.
4D Nail Art with Carving Gel
Advanced sculpting using carving gels.
Blossom Gel
Spreads color automatically for floral effects.
Snowflake Nail Art
Winter-themed designs using stamping or freehand.
Nail Color Pigments
Loose pigments for custom colors and effects.
Bubble Gel
Creates raised bubble texture designs.
Gold Flakes
Luxury metallic flakes for premium nail art.
Glitter Nail Art
Fine, chunky, or holographic glitter usage.
Sugar Nails
Textured, grainy finish using sugar powders.
Polygel Extensions
Hybrid of acrylic and gel offering strength and flexibility.
Acrylic Extensions with Upper Forms
Pre-shaped forms placed over nail for extension.
Acrylic & Polygel Extensions with Lower Forms
Forms placed under nail for custom sculpting.
Spider Gel
Elastic gel creating fine web-like lines.
Conclusion
Professional nail technology blends science, hygiene, structure, and creativity. Mastering nail anatomy, product knowledge, and advanced nail art techniques allows nail artists to deliver safe, durable, and visually stunning results.
MEHNDI CHASKA ACADEMY |
Professional Henna (Heena Mehndi) Theory Book
From Basic to Advanced Bridal & International Mehndi Art
Introduction to Henna (Mehndi Art)
Henna, also known as Mehndi, is a natural dye derived from the leaves of the Lawsonia inermis plant. It has been used for centuries as a form of body art, cultural expression, and celebration across Indian, Arabic, Pakistani, African, and Gulf regions.
Professional mehndi artistry combines precision, creativity, speed, design construction, and cultural understanding. This book is designed to guide students from basic foundational knowledge to advanced bridal and international mehndi mastery.
Overview of Professional Henna Levels
Mehndi Chaska Academy offers structured training through three progressive levels:
- Level 1 – Beginner (Basic Foundation)
- Level 2 – Intermediate (Design Construction & Detailing)
- Level 3 – Advanced (Speed, Bridal & Professional Practice)
Each level builds technical skill, design confidence, and artistic maturity.
LEVEL 1 – BEGINNER (BASIC FOUNDATION)
Basic Knowledge of Henna Elements
This stage focuses on understanding every fundamental aspect of henna application. Strong basics ensure clean designs, consistent flow, and confidence in hand movement.
Henna Cone Rolling & Paste Making (Mixology)
Henna cone preparation and paste consistency are the backbone of professional results.
Cone Rolling
- Correct cone shape for smooth flow
- Tip size control
- Secure sealing to prevent leakage
Paste Making (Mixology)
- Natural henna powder selection
- Liquid ratios
- Resting time for dye release
- Importance of smooth, lump-free paste
Basic Elements of Henna
These elements form the alphabet of mehndi design.
Core Basic Elements
- Straight and curved lines
- Humplines / scallops
- Spirals and swirls
- Dots and clusters
- Teardrops and petals
Mastering these creates control, symmetry, and balance.
Filler Elements (Basic & Advanced)
Fillers enhance richness and density within designs.
Types of Fillers
- Line fillers
- Dot fillers
- Net fillers
- Leaf fillers
- Shading fillers
More than 20+ filler styles help avoid empty spaces and elevate designs.
Understanding Sizes, Shapes & Speed Control
- Small, medium, and bold element balance
- Slow strokes for detail
- Speed strokes for flow designs
- Maintaining uniformity throughout design
Henna Cone Holding Technique
Proper grip ensures smooth movement and reduces hand fatigue.
Key Aspects
- Finger placement
- Angle control
- Wrist movement
- Pressure consistency
Pressure Control Techniques
- Light pressure for thin lines
- Medium pressure for petals
- Heavy pressure for bold outlines
Moon, Moon Flower & Circular Motifs
Understanding circular symmetry helps create mandalas and floral centers with precision.
Perfect Sizes & Shapes
- Consistency in petals
- Balanced spacing
- Proportion matching with hand size
Types of Checks (Basic & Advanced)
Checks create geometric depth.
- Basic box checks
- Double line checks
- Net patterns
- Cross-grid checks
Over 100+ variations are introduced.
Mini Flowers & Roses
- Small floral fillers
- Transitional elements
- Compact rose structures
(20+ variations)
Basic Flowers
Larger flowers form the core of most designs.
- Five-petal flowers
- Layered florals
- Circular floral forms
(20+ styles)
Assessment
- Theory test
- Practical design execution
LEVEL 2 – INTERMEDIATE (DESIGN CONSTRUCTION)
Construction Design Building
Students learn how individual elements connect into complete designs.
Mandala & Floral Mandala
- Center-based symmetry
- Circular expansion
- Balance and spacing
Finger Henna Designs
- Slim layouts
- Vertical flow
- Clean negative spaces
Advanced Floral Knowledge
Flower Types
- Floral flowers
- 3D / realistic flowers
- Gulfy flowers
(20+ styles each)
Leaf Structures
- Basic leaves
- Floral leaves
- Gulfy / Surani leaves
Construction Formulas
Floral Construction Formula 1
- Center → petals → fillers → connectors
Floral Construction Formula 2
- Border → clusters → negative balance
Negative / Reverse / Emboss Work
Designs created by removing space instead of filling.
Types
- 1-inch reverse patterns
- 2-inch reverse patterns
- Normal cut work
- 3D cut work
Feathers & Vines
- Feather strokes
- Gulfy vines
- Negative vines
Floral Patches
- Basic floral patches
- Advanced layered patches
- Emboss raised patches
Assessment
- Theory
- Practical layouts
LEVEL 3 – ADVANCED (BRIDAL & PROFESSIONAL)
Speed Enhancement Techniques
- Flow practice
- Muscle memory training
- Time management for bridal work
Bridal Borders & Belts
- 2-inch borders (50+ styles)
- 4-inch borders (20+ styles)
Bridal Mehndi Layouts
- Wrist-length designs
- 3/4 hand layouts
- Elbow-length designs
Indian Bridal Startup Designs
- Initial focal motifs
- Bridal story building
Connecting & Hanging Elements
- Chains
- Bells
- Tassels
- Drops
Surani & Khaleeji Patterns
- Bold spacing
- Heavy outlines
- Arabic influence
Bridal Demonstrations
- Indian bridal hand
- Bridal legs
- Floral bridal fusion
Pakistani Bridal Concept
- Dense patterns
- Intricate fillings
- Story-based layouts
Traditional Indian Bridal Mehndi
- Full coverage
- Symbolic motifs
- Cultural elements
Feet Mehndi Designs
- Centered mandalas
- Border-based layouts
- Toe detailing
Professional Growth & Client Handling
- Client consultation
- Design selection
- Pricing strategies
- Record book maintenance
Marketing & Photography Knowledge
- How to click professional mehndi photos
- Lighting & angles
- Background selection
- Portfolio building
Evaluation & Revision
- Final examination
- Design demo discussion
- Doubt clarification
- Professional readiness
Conclusion
Mehndi artistry is a blend of technique, tradition, creativity, and professionalism. Mastery requires discipline, practice, and artistic vision. This structured learning ensures students become confident, skilled, and market-ready mehndi artists.
Basic Flowers (Corrected Professional Theory Text)
Basic flowers form the foundation of most mehndi designs. They act as focal points, connectors, and fillers within traditional, Arabic, Indo-Arabic, and bridal patterns. Mastery of basic floral structures allows an artist to create balanced, elegant, and scalable designs suitable for hands, arms, and feet.
Five-Petal Flowers
Five-petal flowers are the most commonly used floral structure in mehndi art.
Characteristics:
- Evenly spaced petals around a central point
- Balanced symmetry
- Suitable for mandalas, fillers, and main motifs
Variations include:
- Rounded petals
- Pointed petals
- Overlapping petals
- Bold outline petals
- Soft shaded petals
Layered Floral Designs
Layered florals consist of multiple rows of petals placed one above another, creating depth and richness.
Key features:
- Inner petal layer with outer expanded petals
- Used in bridal and heavy designs
- Creates a three-dimensional visual effect
Common variations:
- Double-layer flowers
- Triple-layer floral structures
- Mixed petal sizes
- Outline and shaded combinations
Circular Floral Forms
Circular floral forms are flowers constructed using circular motion and continuous strokes.
Purpose and usage:
- Used in mandalas and wrist layouts
- Provides flow and softness
- Ideal for Arabic and fusion designs
Style variations include:
- Circular spiral flowers
- Ring-based petals
- Loop and swirl florals
Design Variations
Through changes in:
- Petal length and width
- Stroke pressure
- Spacing between petals
- Outline thickness
- Filler usage
Artists can create numerous floral variations, making basic flowers adaptable for simple, intermediate, and advanced mehndi designs.
🔹 LEVEL 1 – BEGINNER (FOUNDATION THEORY)
Basic Elements of Henna Design
Basic elements are the building blocks of every mehndi design. Mastery of these elements ensures smooth flow, accuracy, and consistency.
Lines
Lines are the foundation of all patterns.
- Straight lines
- Curved lines
- Double lines
- Thick and thin strokes
Line control helps in borders, checks, and structure.
Humps / Scallops
Humps are semi-circular strokes used to form borders and floral outlines.
- Small humps for detailing
- Large humps for bold designs
- Open and closed scallops
Spirals & Swirls
Spirals create softness and movement in designs.
- Tight spirals for fillers
- Open swirls for Arabic flow
- Spiral combinations with dots
Dots
Dots add balance and finishing.
- Single dots
- Cluster dots
- Gradient dot placement
Teardrops
Teardrops form petals, leaves, and fillers.
- Long teardrops
- Short teardrops
- Outlined and filled teardrops
Filler Elements (Basic & Advanced)
Fillers enhance density and richness within designs.
Types of Fillers
- Line-based fillers
- Dot-based fillers
- Net and mesh fillers
- Leaf fillers
- Shading fillers
Fillers help maintain balance and avoid empty spaces in designs.
Understanding Sizes, Shapes & Speed
Professional mehndi requires control over proportion and pace.
- Small elements for detailing
- Medium elements for structure
- Bold elements for highlights
- Slow speed for accuracy
- Fast speed for flow-based designs
Henna Cone Holding Technique
Correct cone holding ensures smooth application and reduces hand strain.
- Proper finger placement
- Correct cone angle
- Wrist and elbow movement
- Consistent pressure flow
Pressure Control Techniques
Pressure determines line thickness and clarity.
- Light pressure for fine details
- Medium pressure for petals and leaves
- Heavy pressure for borders and bold motifs
Moon & Moon Flower Designs
Moon shapes form the base of many floral patterns.
- Half-moon strokes
- Full-moon floral centers
- Moon-based mandala elements
Perfect Sizes & Shapes
Consistency is essential for professional-looking designs.
- Equal petal sizes
- Balanced spacing
- Proportion matching hand size
Checks (Geometric Patterns)
Checks add structure and contrast.
Check Design Concepts
- Square checks
- Diamond checks
- Net grids
- Cross patterns
Checks are commonly used in bridal and Arabic designs.
Mini Flowers & Mini Roses
Mini florals act as fillers and connectors.
Characteristics
- Small size
- Quick execution
- Clean symmetry
Used to fill gaps without overpowering main motifs.
🔹 LEVEL 2 – INTERMEDIATE (DESIGN CONSTRUCTION)
Design Construction Principles
Design construction teaches how individual elements connect into a complete layout.
- Flow direction
- Spacing balance
- Visual weight distribution
Mandala Designs
Mandalas are circular designs built from the center outward.
Key Concepts
- Symmetry
- Layering
- Radial balance
Floral Mandala
Floral mandalas combine flower structures with circular layouts.
- Central floral core
- Repeating petal layers
- Decorative fillers
Finger Mehndi Designs
Finger designs enhance elegance.
- Vertical layouts
- Slim structures
- Clean negative spaces
Floral Flower Variations
Floral flowers are expressive and decorative.
Design Concepts
- Rounded petals
- Pointed petals
- Mixed petal shapes
- Outline and shaded combinations
3D / Realistic Flowers
3D flowers create depth and realism.
Key Features
- Layered petals
- Shading effects
- Overlapping strokes
Used mainly in bridal and premium designs.
Gulfy Flowers
Gulfy flowers are bold and spaced.
- Thick outlines
- Minimal fillers
- Strong visual impact
Leaf Structures
Basic Leaves
- Single stroke leaves
- Double stroke leaves
Floral Leaves
- Curved decorative leaves
- Shaded leaf patterns
Gulfy / Surani Leaves
- Bold shapes
- Open spacing
- Arabic-inspired flow
Floral Construction Formula 1
- Main flower placement
- Supporting flowers
- Fillers and connectors
Floral Construction Formula 2
- Border-based florals
- Repeating clusters
- Balanced negative space
Negative / Reverse / Emboss Work
Negative work focuses on empty space to create design contrast.
Techniques Include
- Reverse filling
- Cut work
- Raised emboss effects
Cut Work Designs
- Normal cut work for elegance
- 3D cut work for depth
Feathers
Feathers add softness and movement.
- Fine feathers
- Bold feathers
- Layered feather strokes
Vines
Gulfy Vines
- Thick strokes
- Flow-based patterns
Negative Vines
- Space-based vine structures
- Light and airy appearance
Floral Patches
Patches are compact design units.
Types
- Basic floral patches
- Advanced layered patches
- Emboss raised patches
PART 1: BASIC TO BRIDAL MEHENDI – FOUNDATION THEORY
1. Henna Paste Making
Henna paste is the backbone of good mehndi design.
Definition:
Henna paste is a natural dye prepared from dried henna leaves mixed with liquids and essential oils to achieve rich color and smooth flow.
Key Principles:
- Correct powder quality ensures deep stain
- Proper consistency ensures smooth lines
- Fresh paste gives darker results
Types of Henna Paste:
- Natural Henna Paste
- Organic Henna Paste
- Essential Oil Mixed Paste
2. Cone Making
Henna cones control line quality.
Purpose:
- Precision
- Flow control
- Speed management
Types of Cones:
- Plastic cone
- Cellophane cone
- Pre-rolled cone
Correct cone size determines thin, medium, or bold lines.
3. Line Making Techniques
Lines are the foundation of all designs.
Types of Lines:
- Thin lines
- Thick lines
- Tapered lines
- Continuous flow lines
Key Factors:
- Hand pressure
- Speed control
- Cone angle
4. Basic Elements – Tips & Tricks
Elements are the smallest units of design.
Basic Elements Include:
- Dots
- Teardrops
- Curves
- Spirals
- Humps
- Scallops
These elements form the base for borders, florals, and figures.
5. Borders (Basic & Bridal)
Borders frame the design.
Types of Borders:
- Straight borders
- Curved borders
- Floral borders
- Bridal heavy borders
Bridal borders are thicker, layered, and more detailed.
6. Bridal Checks
Checks create balance and structure.
Types:
- Square checks
- Diamond checks
- Layered checks
- Net checks
Used extensively in bridal palms and feet.
7. Filling & Filler Elements
Fillings add richness.
Filling Elements:
- Lines
- Dots
- Leaves
- Mesh
- Textures
Filler Elements:
- Mini florals
- Grids
- Shading strokes
8. Shapes
Shapes help in layout formation.
Common Shapes:
- Circle
- Semi-circle
- Triangle
- Paisley
- Oval
9. Leaves & Flowers
Leaves and flowers define the design style.
Leaf Types:
- Simple leaf
- Arabic leaf
- Gulf leaf
- Shaded leaf
Flower Types:
- Five-petal flower
- Layered flower
- Lotus
- Rose
- Mandala flower
10. Motifs & Traditional Elements
- Lotus
- Ambi (Paisley)
- Peacock
- Jhumka
- Kalash
- Dhol
- Shehnai
- Gathbandhan
These elements hold cultural significance in bridal mehndi.
PART 2: ADVANCE FIGURE CLASSES – THEORY
Figure mehndi is considered high-level professional work.
1. Face Orientation Theory
Understanding angles is essential.
Face Types:
- Side face
- ¾ face
- Front face
Used for both bride and groom figures.
2. Bride & Groom Figures
Figures are symbolic storytelling elements.
Includes:
- Side face groom
- Side face bride
- Front face bride & groom
- Bride with groom
- Engagement figures
Focus areas:
- Facial proportions
- Attire detailing
- Jewelry highlights
3. Full Body Structure
Used in premium bridal designs.
Includes:
- Full bride structure
- Full groom structure
- Movement posture
- Outfit flow
4. Wedding Scene Figures
Advanced storytelling designs:
- Varmala scene
- Agni phere
- Doli
- Ghoonghat
- Baby shower
- Radha–Krishna theme
5. Animal & Royal Elements
Symbolize grandeur.
- Royal elephant
- Chain elephant
- Baby elephant
- Groom with elephant
PART 3: BASIC TO BRIDAL FULL COURSE – TECHNIQUES
BASIC LEVEL
Focus on hand control and fundamentals.
- Basic elements
- Thick & thin line control
- Shapes, flowers, paisley
- Grids and fillings
- Arabic design basics
ADVANCE LEVEL
Enhances complexity and layout skills.
- Belts
- Intricate grids
- Peacock themes
- Negative & reverse filling
- Cutwork
- Layout formation
FLORAL SPECIALIZATION
Focuses on elegance and softness.
- Khafeef flowers
- Gulf flowers
- Floral bunches
- Floral vines
- Bandhani style
- Mandala style
- Pakistani & Gulf fusion
BRIDAL SPECIALIZATION
Premium bridal composition.
- Kalash & dholak
- Bride & groom figures
- Doli & shehnai
- Figure-based bridal layouts
- Floral bridal balance
LEVEL 1 – BASIC MEHENDI DESIGNING COURSE (BEGINNER)
Level 1 is designed to build a strong technical and artistic foundation in mehendi designing. This stage focuses on understanding materials, mastering basic strokes, and developing design sense before advancing to professional styles.
Paste Making (Colour & Stainless)
Mehendi paste quality directly affects stain depth and design clarity.
Types:
Natural/Stainless Mehendi Paste – Made from pure henna powder, essential oils (eucalyptus, cajeput), sugar, and lemon juice. Preferred for traditional and bridal work.
Colour Mehendi Paste – Used for temporary designs; includes cosmetic-grade pigments.
Sub-types:
Fresh paste
Pre-soaked paste
Ready-made cones (quality evaluation taught)
Cone Making & Handling
Cone making ensures smooth flow and line control.
Types of cones:
Cellophane cone
Plastic sheet cone
Ready-made applicator cone
Handling methods include pressure control, wrist angle, grip positioning, and cone tip cutting techniques.
Basic Elements Practice
Core elements are repeated strokes that form designs.
Types:
Lines (thin, thick, curved)
Dots (single, cluster, gradient)
Teardrops
Spirals
Semi-circles
Supporting Elements
These enhance the main motif.
Types:
Outlines
Borders
Connectors
Framing elements
Grids
Grids provide structure and symmetry.
Types:
Square grid
Diamond grid
Circular grid
Net grid
Fillers
Fillers complete empty spaces.
Types:
Leaf fillers
Dot fillers
Line fillers
Cross fillers
Shaded fillers
Shading Techniques
Used to add depth.
Types:
Single-line shading
Double-line shading
Mesh shading
Gradient shading
Flowers (24 Types)
Categories:
Bold flowers
Shaded flowers
Semi-realistic flowers
Realistic layered flowers
Includes rose, lotus, sunflower, mogra, and abstract florals.
Paisley Shapes
Types:
Traditional paisley
Curved paisley
Double paisley
Modern paisley
Leaves
Types:
Simple leaves
Veined leaves
Curved leaves
Shaded leaves
Floral Bunches
Arrangement techniques combining flowers, buds, leaves, and fillers.
Arabic & Dubai Style Mehendi
Focus on flowy patterns, spacing, and bold outlines.
Concept understanding
Demonstration-based learning
Design Layout Practice
Students learn palm, finger, and backhand composition principles.
LEVEL 2 – PROFESSIONAL BRIDAL MEHENDI COURSE
This level transforms students into professional bridal artists, emphasizing detail, storytelling, and full-hand layouts.
Advanced Lines & Curves
Precision control for bridal detailing.
Trendy Fillers & Grids
Types:
Chevron grids
Jaali work
Negative grids
Contemporary checks
Border Designs
Types:
Mughal borders
Floral borders
Architectural borders
Minimal modern borders
Unique Flowers
Includes lotus startup designs and layered floral construction.
Negative Cutwork
Designs created by leaving skin visible.
Types:
Geometric cutwork
Floral cutwork
Symbolic cutwork
Motifs
Animals & Birds:
Peacock (traditional, dancing, feather-based)
Elephant
Cow
Parrot, swan, decorative birds
Cultural & Ritual Elements
Kalash
Gathbandhan
Havan Kund
Musical instruments (Tabla, Shehnai, Dholak)
Divine & Human Figures
Ganesh Ji
Bride & Groom
Western couple
Radha Krishna Ji
Bridal Layout Concept
Students learn:
Full-hand balance
Theme-based storytelling
Front hand & backhand coordination
LEVEL 3 – FIGURE MASTER COURSE
This advanced level focuses on figure accuracy, facial proportion, and storytelling mastery.
Face Proportion Studies
Types:
Side face
Front face
¾ angle face
Applied separately for bride and groom.
Full Body Proportion
Traditional bride
Traditional groom
Movement-based posture
Ceremony-Based Figures
Varmala
Sindoor
Mangalsutra
Shading Techniques
Advanced face shading:
Light mapping
Shadow placement
Hair texture shading
Hand Gestures
Types:
Holding varmala
Blessing pose
Musical holding gestures
Western & Theme Figures
Engagement-style couples
Baby shower figures
Miniature storytelling figures
Divine Figures
Shiva-Parvati
Radha-Krishna with expression detailing
Reference Image Creation
Students learn to convert photos into mehendi-compatible figures.
Combining Multiple Figures
Example: Bride with parents, family storytelling scenes.
Full Hand Bridal Demo with Figures
Live demonstration of complete bridal composition.